In getting started with Nuxt 3 we learned how to get started with Nuxt3, a static site generator using Vue3 and Typescript, we also learned and gained an understanding Nuxt 3 minimal project structure to explore some key concepts.
In how to use modules in nuxt 3 we walked through the process of how to extend functionality in Nuxt by adding modules and we will have to go through that same process to add an additional module for this post.
In this post, we are going to explore how we can create, edit and store content for our website in Markdown files and then render that content on our site when deployed, using the Nuxt Content Module
What is the Nuxt Content Module
Nuxt content provides a File Based Data Layer to your Nuxt 3 application, it is an official module developed by the nuxt core team.
The first step to activating our CMS capabilities in our app, we need to install the Nuxt Content Module , this will provide our app with the capability to read a directory, typically a directory name content and parse files such as:
- Mark Down (
.md) - YAML (
.yml) - Comma Separated Values (
.csv) - Javascript Object Notation (
.json)
The added benefit of using Content Module is that it enables the ability to Mark Down Components (MDC) which is a concept we will discuss in further detail in a future post.
How to install the Nuxt Content Module
Installing the Nuxt Content module is as simple as using your preferred javascript package manager to add the dependency to your project.
In my case, my current preference is to use Yarn, which I will use here to add the Nuxt Module as development dependency.
yarn add -D @nuxt/content
Once the installation process is complete we then need to update our nuxt.config.ts to ensure that the content module is referenced in our list of modules.
export default defineNuxtConfig({
modules: [
    '@nuxt/content'
  ],
}})
Creating Content for our Nuxt 3 website.
We have finished installing and configuring our nuxt content module, we can now shit attention to creating some content we want to display on our website. We're going to focus on creating content for our website using Markdown files.
The Nuxt Content Module defaults to using a folder named content in our project folder so our first step is to create the folder if it doesn't already exist. You can do this by simply making use of the following terminal command in the root of your project folder.
mkdir content
How to create content for Nuxt 3 Content Module
For the purpose of this post we will create a really simple Blog engine, enabling us to write our blog post in markdown files. Lets create an additional folder in our content folder which we'll name blog
mkdir content/blog
We can now also add our first blog post to this directory and in true programmer style we're going to name our file hello-world.md
touch content/blog/hello-world.md
Once we have created our file, we can now add some content to the file. However, before we do that lets just explain the layout of the file we're going to implement.
First, we will add the metadata section of the file, which simply demarcated by using a set of opening and closing three dashes --- In between these open and closing dashes we can provide any number of Key-Value pair of meta data content we want to provide details about the post.
I have simply created the standard type of meta data that you may associate with a blog post, you can add however much we want or feel you need. I'm going to try and keep this short and succinct for demonstration purposes. All these titles and values should be fairly easily understood.
The only point probably worth a mention is that you may notice that featureImage I have made a slightly more complex object because it needs to contain two values:
- the Url string for the path to the image we want to use
- The title of the image that we can use in the
alttag
---
title: Hello World!
description: A timeless programmer introduction to new concepts
summary:  An introductory blog post
author:
  name: Gary Woodfine
  github: garywoodfine
  imageUrl: /images/garywoodfine.png
featureImage:
  url: /images/hello-world.jpg
  title: hello world
publishDate: 04 March 2023
publishDateTime: 2023-03-04:17:30
---
In order to add the actual content of our post we can write this in markdown below the closing 3 dashes of the meta. You are free to add as much content as you feel you need, and because I'm lazy and this is only for demonstration purposes I am just going to add some back data.
The final markdown file should look something like the content below
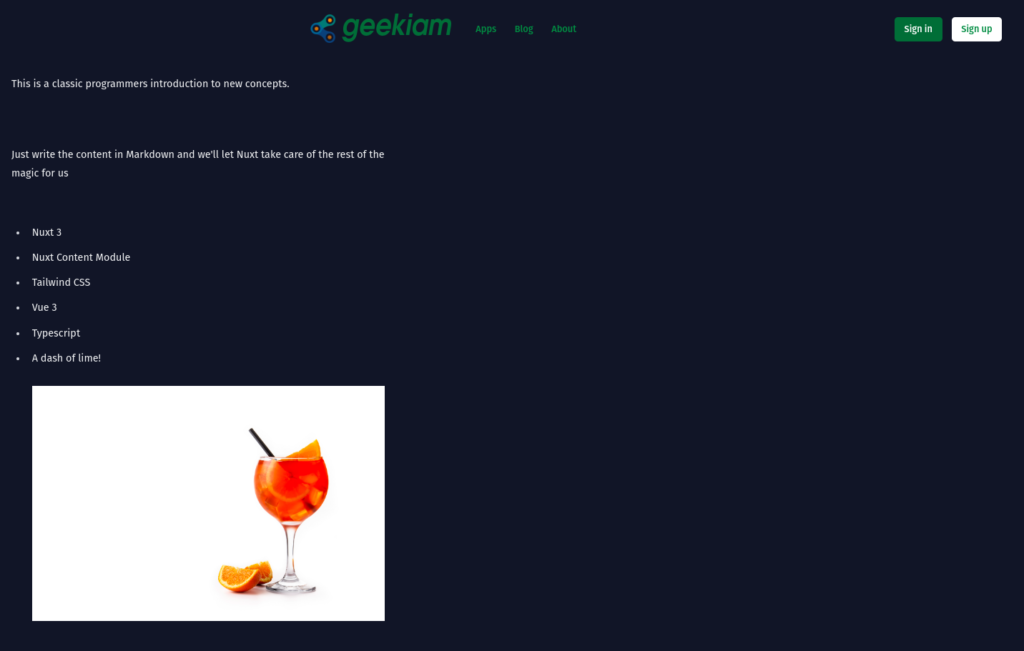
--- title: Hello World! description: A timeless programmer introduction to new concepts summary: An introductory blog post author: name: Gary Woodfine github: garywoodfine imageUrl: /images/garywoodfine.png featureImage: url: /images/hello-world.jpg title: hello world publishDate: 04 March 2023 publishDateTime: 2023-03-04:17:30 --- This is a classic programmers introduction to new concepts. ### How to write a blog post in Nuxt Just write the content in Markdown and we'll let Nuxt take care of the rest of the magic for us #### What have we used to create this blog * Nuxt 3 * Nuxt Content Module * Tailwind CSS * Vue 3 * Typescript * A dash of lime! 
How to display content using Nuxt 3 and content module
We are now going to get our hands dirty with some code now, as we learn some of the basics on how to use the content module to display the content in our Nuxt app.
If you've been following along the series articles on getting started with Nuxt 3 then we created a really simple application in How to use modules in nuxt 3 where added the Tailwind module and added some really simple styling options. We're going to expand up that base now and develop a really simple blog engine layout.
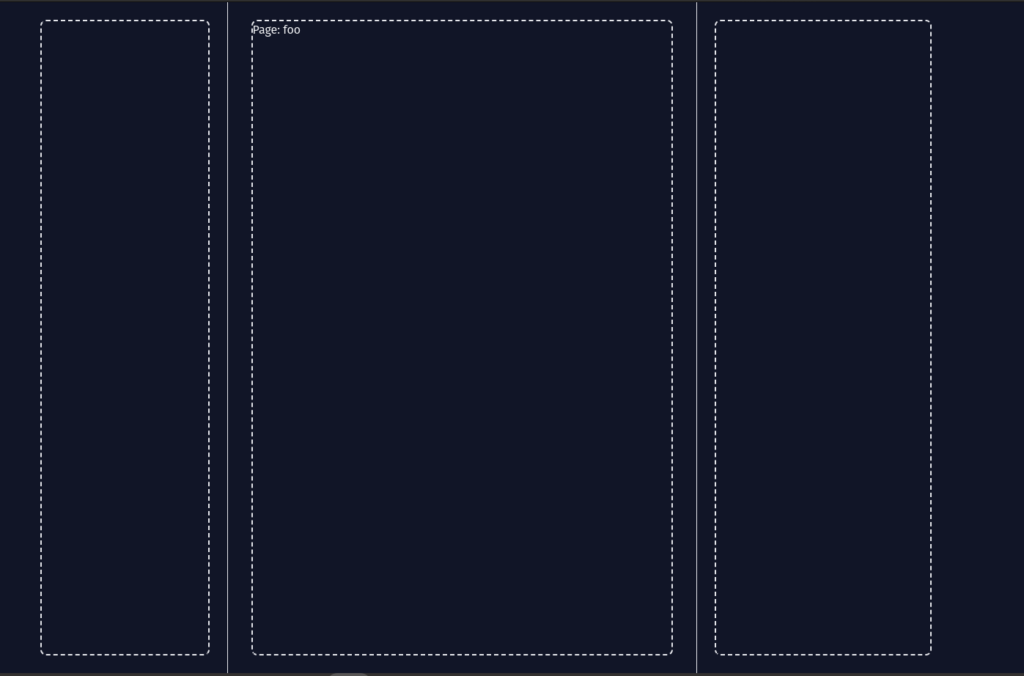
In how to use layouts in Nuxt 3 we learned how to use the Layouts and Pages in Nuxt 3 to design our various pages that we'll use in our applications to use different layouts and created a classic 3 column layout we're going to use in our application.
This is looking pretty cool for now, our next step is to create a component for that will be used to show a card for each of our individual blog posts.
In How to create Components in Nuxt 3, we take a detailed walk-through of components in Nuxt 3 which will give you a deeper grounding on components. However, for the purpose of this guide we created a card component which will be used in creating a list of blog posts that are available.
We'll use the nuxi command to generate a new component for our blog section which we are going to name card
nuxi add component blog/card
The above command will generate the following file for us

We will add some mark up here to display our card. Our card contains all the mark up we need to display our content. We'll also make use of passing in a property into this component by the name of post.
<template>
  <a :href="post._path" class="relative flex flex-col gap-8 lg:flex-row">
    <div class="relative aspect-[16/9] sm:aspect-[2/1] lg:aspect-square lg:w-64 lg:shrink-0">
      <img :src="post.featureImage.url" :alt="post.featureImage.title" class="absolute inset-0 h-full w-full rounded-2xl bg-gray-50 object-cover" />
      <div class="absolute inset-0 rounded-2xl ring-1 ring-inset ring-gray-900/10" />
    </div>
    <div>
      <div class="flex items-center gap-x-4 text-xs">
        <time :datetime="post.publishDate" class="text-green-900 dark:text-green-600">{{ post.publishDate }}</time>
      </div>
      <div class="group relative max-w-xl">
        <h3 class="mt-3 text-lg font-semibold leading-6 text-gray-900 dark:text-gray-100 group-hover:text-gray-600 dark:group-hover:text-gray-400">
          <a :href="post._path">
            <span class="absolute inset-0" />
            {{ post.title }}
          </a>
        </h3>
        <p class="mt-5 text-sm leading-6 text-gray-600 dark:text-gray-100">{{ post.description }}</p>
      </div>
      <div class="mt-6 flex border-t border-gray-900/5 pt-6">
        <div class="relative flex items-center gap-x-4">
          <img :src="post.author.imageUrl" alt="" class="h-10 w-10 rounded-full bg-gray-50" />
          <div class="text-sm leading-6">
            <p class="font-semibold text-gray-900">
              <a :href="githubUrl">
                <span class="absolute inset-0" />
                {{ post.author.name }}
              </a>
            </p>
            <p class="dark:text-green-600 text-green-800">{{ post.author.name }}</p>
          </div>
        </div>
      </div>
    </div>
</a>
</template>
Querying Content with the Nuxt 3 Content Module
In our example we are going to query the content we created using the functionality provided to us by the Content Module.
We are going to use a Nuxt 3 provided function useAsyncData to get access to data that resolves asynchronously. We will essentially use this as a wrapper to query our content using the queryContent that is provided to us by the Nuxt Content module.
In our index.vue which we'll use our default page when users enter our blog, we'll add the following TypeScript code, to query our blog folder we created in the content to retrieve all the content which we will name as posts.
import Card from "~/components/blog/card.vue";

const {data: posts } = await useAsyncData('posts', () => queryContent('/blog').find());
Our template code will then iterate through each post in the collection and display our card component for each post.
<template>
  <nuxt-layout name="list">
    <template #leftColumn>

    </template>
    <template #middleColumn>
      <article v-for="post in posts" :key="post.id" class="relative isolate flex flex-col gap-8 lg:flex-row">
        <card :post="post" />
      </article>
    </template>

    <template #rightColumn>

    </template>
  </nuxt-layout>
</template>
If we run our application, we'll see the fruits of our labour as follows. We've created the landing page of our blog and provide the user with the list of blog posts they can read.

We can now create the page the user can view and read out content. In this example we are going to use a slightly different layout to read the content, but the UI style etc is not important and essentially it basically involves creating another layout to use.
To create the page we'll use we'll use nuxi to create a catch all route page to match all routes under the path.
nuxi add page [...slug]
we'll add the following code to get the content for the page we would like to display. The useRoute composable returns the current route, we'll use the value from that in where claus of our query to get the file.
const route = useRoute()

const {data: post} = await useAsyncData('post', () => queryContent('/blog')
    .where({_path: route.path})
    .findOne())
As per our previous page we'll simply use this to display the content. The one thing to note here is that we make use of the content-renderer component provided by the Nuxt Content Module to render the document we retrieved from the query, this component in turn will make use of the ContentRendererMarkdown component to render our MarkDown content.
In this example we are going to keep it really simple by making use of the default behaviour of the Content Renderer component, in future articles we will be diving deeper to explore how to further leverage the power in this component.
<template>
  <nuxt-layout name="post">
    <template #mainContent >
     <content-renderer :value="post" />
    </template>

    <template #rightColumn>

    </template>
  </nuxt-layout>
</template>
Our really simple blog layout will then appear as follows. As you can see with really minimal effort we have developed the basis of a really powerful blog engine. We have only scratched the surface of what we can do with the content module

Conclusion
The content module enables us to create really rich functionality super easily. We have created a really solid foundation to build on using the Nuxt 3 Content Module and as we progress further through this tutorial series we'll explore how to make use of the more enhanced functionality of what the Nuxt Content Module provides.

- What is this Directory.Packages.props file all about? - January 25, 2024
- How to add Tailwind CSS to Blazor website - November 20, 2023
- How to deploy a Blazor site to Netlify - November 17, 2023

