
In getting started with Nuxt 3 we learned how to get started with Nuxt3, a static site generator using Vue3 and Typescript, we also learned and gained an understanding Nuxt 3 minimal project structure to explore some key concepts.
What are layouts in Nuxt 3
Layouts in Nuxt 3, enable you to define a common structure for the pages of your application. You can think of a layout is a wrapper component that wraps around the content of a page. Enabling the design and definition of consistent structure for your pages, such as a header, footer, and sidebars, and reuse this structure across multiple pages.
Layouts are defined as Vue components and are stored in the layouts directory of your Nuxt 3 project. You can define as many layouts as you need, and each layout can be customised to meet the specific needs of your application.
The main purpose of Layouts are to extract repeated parts of pages into a single place. This is for code readability and maintainability, but it also provides performance benefits..
How to use layouts in a Nuxt 3 project
To use a layout, you simply specify it in the layout property of your page component. You can also specify a layout dynamically based on the content of the page.
In addition to custom layouts, Nuxt 3 also provides a default layout that includes components for displaying the content of the page, a loading indicator, and an error message if an error occurs while loading the page. You can customize the default layout by overriding its components or by providing your own layout entirely.
If you're familiar with layouts in previous versions of Nuxt then only thing you need to know about layouts in Nuxt 3, is that you no longer need to use the <Nuxt> component with in a layout to render the page. In Nuxt 3, layouts make use of Vue slots instead, so you now need to make use of the <slot /> component.
How to create a layout in Nuxt 3
In Getting Started with Nuxt3 we introduced and provided instructions on using and installing nuxi the nuxt CLI, which enables creating and managing Nuxt 3 projects. You've more than likely used nuxi to generate the Nuxt 3 project you're currently working on, if you're following along with How to build a blog with Nuxt 3 & Netlify then you've used it on several occasions already, in fact in How to use modules in nuxt 3 you may have already used it to create a layout and page
The good news, is that we're are able to use nuxi to generate our layouts for us, simply by using the command structure below
nuxi add layout <name of the layout>
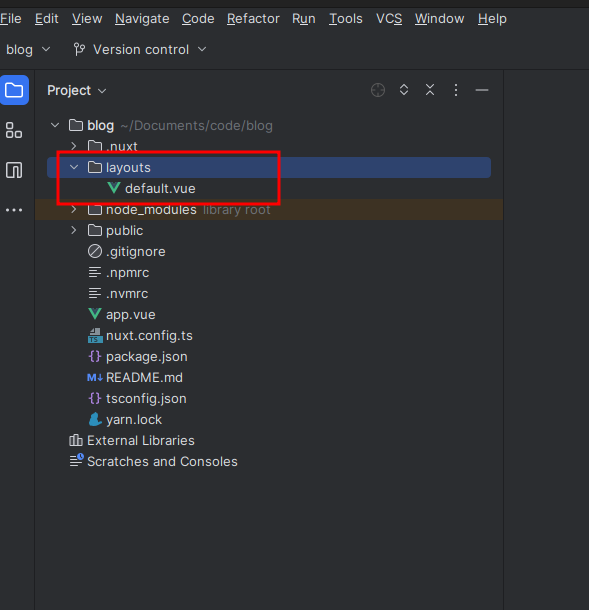
Let's go ahead and use nuxi to generate a default layout for us to use. The name of the layout we're going to create is default , this is because we're going to make use of a feature in Nuxt 3 of convention over configuration, and if we use the standard naming convention Nuxt will use this layout if no other layout has been defined.
We can use nuxi to create this file for us simply using
nuxi add layout default
This command will generate a new file and a new folder in our Nuxt 3 project.
The file created will be a basic Vue Component with all the basic tags and attributes ready for us to start coding.
<script lang="ts" setup></script>

<template>
  <div>
    Layout: default
    <slot />
  </div>
</template>

<style scoped></style>
There is not really a whole lot to explain here as what is generated is just a simple vue component. The only thing really worth mentioning is that the <slot /> component is important when it comes to building Nuxt 3 Layouts.
The <slot /> component identifies as the placeholder for the code or content that is injected by pages or other components. The Vue documentation discusses Slots in more detail, and it may be worth learning more about them if you are unfamiliar with the concept.
For the time being we have completed our initial layout and we have more than enough to be able to start using. Let go ahead and generate a new page for our application for this we'll use nuxi and convention over configuration because we'll name our new page index
nuxi add page index
Just like the layouts command earlier this command will create a new pages folder and new vue component file
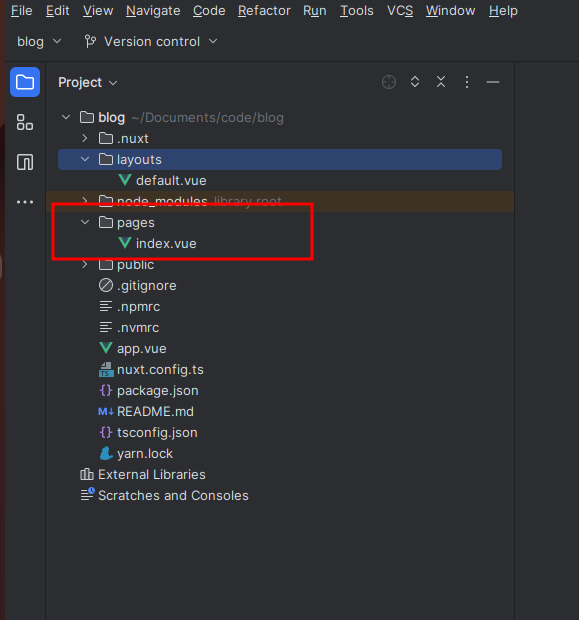
The content of this file will also be a really simple component
<script lang="ts" setup></script>

<template>
  <div>
    Page: foo
  </div>
</template>

<style scoped></style>
We have now created our Simple Layout and Page we can configure our Application to use them. If we update our app.vue with the following code.
<template>
  <div>
    <NuxtLayout>
       <NuxtPage />
    </NuxtLayout>
  </div>
</template>
In this example we're making use of the <NuxtPage> component which is a a built-in component that comes with Nuxt 3. NuxtPage is required to display top-level or nested pages located in the pages/ directory.
NuxtPage is a wrapper around <RouterView> component from Vue Router. NuxtPage component accepts same name and route props.
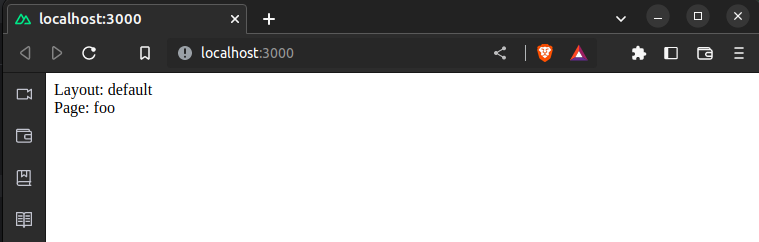
In this example because we've give our first page the name index when we run our app, Nuxt will use that page as the default page to display.
If we run our app now, using your CLI and your preferred package manager, in my case I'm using yarn
yarn dev
we'll see our amazing new app running and it will print out to display that we're making use of the layout and page we created
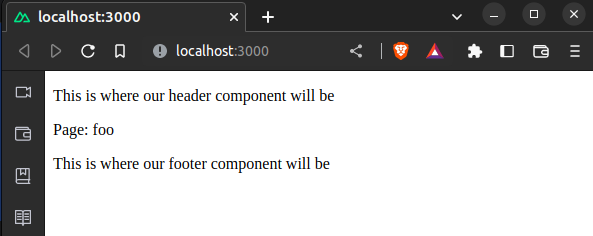
If we make some updates to our layout file , For instance if we want to add a some additional content or other components that we want to display on all pages we can do so.
In this example, in order to keep it simple and easy to follow, I will simply add some paragraphs to which indicate that we are adding Header and Footer components. In our layout.vue we'll update the code to include
<script lang="ts" setup></script>

<template>
  <div>
    <p>This is where our header component will be </p>
    <slot />
    <p>This is where our footer component will be </p>
  </div>
</template>
If we inspect our running page now we'll see that the content has been updated as follows
In How to use modules in Nuxt 3 we walk-through the process of configuring our project to make use of Tailwind CSS to make it easier to add styling to our Nuxt 3 Application.
How to define additional layouts
When developing applications a typical scenario may arise you would like slightly different layouts for some pages or some additional features on some pages. You can easily use nuxt layouts to achieve this.
In this scenario, say we want to create an additional page and we want to have a slightly different content on that page. Lets create a another simple layout which we'll call breadcrumb and we'll add some real basic content.
nuxi add layout breadcrumb
<script lang="ts" setup></script>

<template>
  <div>
    <p>This is the Breadcrumb</p>

    <slot />
  </div>
</template>
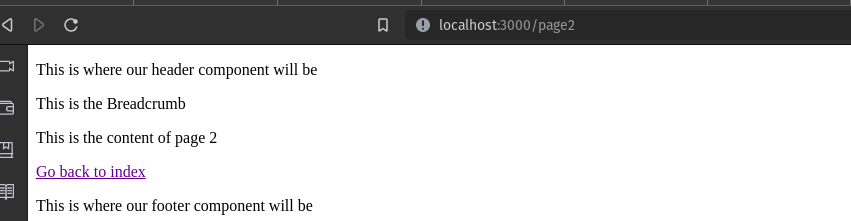
We can then create a new page and we'll simply call it page2, and add some basic content. We'll also wrap it in <layout> tag and use the name property to define which layout we want to use.
nuxi add page page2
<script lang="ts" setup></script>

<template>
 <nuxt-layout name="breadcrumb">


   <p>This is the content of page 2</p>

   <nuxt-link to="/">Go back to index</nuxt-link>
 </nuxt-layout>

</template>
If we update the on the index to also have a link to enable us to navigate to our page2.
<script lang="ts" setup></script>

<template>
  <div>
    Page: foo

    <nuxt-link to="page2">Go to Page 2</nuxt-link>
  </div>
</template>
If we run the application and navigate to our Page2 we'll see that the overall layout remains the same and our page is displayed with the additional layout.
Define a layout using code
When developing an application, you may come across scenarios where you may not want to explicitly define a layout in mark up and would like the ability to define different layout for page at run time. Well you're in luck because nuxt makes this really easy and provides us the ability to do exactly that.
One approach to do this, we could use the definePageMeta function in our script block to define the layout we would like to use on the page. We will also remove the <layout> from the page mark up.
<script lang="ts" setup>
definePageMeta({
  layout: "breadcrumb",
});

</script>

<template>
    <p>This is the content of page 2</p>

   <nuxt-link to="/">Go back to index</nuxt-link>
</template>
If we run the application and navigate between the pages we'll notice that nothing has changed and the application behaves exactly as it did before. The only thing that has changed is that we just slightly changed the way we've defined which layout to use for page2.
The definePageMeta is a compiler macro that you can use to set metadata for your page components located in the pages/ directory. You use this macro to set custom metadata for each static or dynamic route of your Nuxt application.
- What is this Directory.Packages.props file all about? - January 25, 2024
- How to add Tailwind CSS to Blazor website - November 20, 2023
- How to deploy a Blazor site to Netlify - November 17, 2023