
I usually don't like to jump on the Microsoft hype trains too quickly when it comes to their next supposedly world changing and amazing software development tools and platforms, from experience many of them have a tendency to disappear just as quickly as they appear. I usually like to leave it for a period of time and wait for all the MVP's to stop falling all over themselves to gush over the latest release.
Blazor has been around for at least 2 or 3 years at the time of writing, and for the most part it does start to look like it could at least be a contender to start learning about and adopt it. If for nothing else there may probably be at least a few enterprise software application out there that may need either supporting or at the very least help to get them out of a hole they may have painted themselves into by adopting the latest and greatest as it came out.
Single-page applications (SPAs) have become an essential part of modern technology. We have become more dependent on browsers than ever before. With the release of Angular, ReactJS, and other JavaScript frameworks for developing modern web apps, with JavaScript as the dominant development language in the field for many years as the only language to be understood and run in browsers. In 2015, WebAssembly arrived as a technology experiment that allowed browsers to run programming languages other than JavaScript, such as C# and C.
WebAssembly has opened the doors to enable the development of powerful web apps in browsers. Microsoft was the first adopter of WebAssembly by announcing Blazor, a framework that allows .NET developers to build modern and advanced web applications using C# that can run natively in a browser.
In this walkthrough guide I thought I would explore how to create a simple Blazor application and deploy it to netlify, just to get a feel of how its done. So in this guide we're going to go through the following high level steps.
In order to follow along and work through the steps yourself you'll need
- .net cli
- git
- Github Account
- Netlify Account
Create a git repository
I am going to assume you already have the git and the Github CLI installed on your machine, if you haven't you can use How to install Github CLI on Linux where I walk you through how to install and use the Github CLI, and
How to install Git on Linux to install and start using git.
We'll start off by creating a Github Repository for our application and to do this we will simply use the CLI to do so.
gh repo create garywoodfine/blazorsample --public
# Remember to use your own account and repository name for this step
once we have created our new repository we can clone it to workstation to start working on it straight away
gh repo clone garywoodfine/blazorsample
# Remember to use your own account and repository name for this step
With our repository cloned to our local machine we can now simply change into that directory using cd blazorsample and create a gitignore file, which we will use a handy command that is made available to us by the dotnet cli,
dotnet new gitignore
Create a Blazor Web Assembly project
We're now ready to create a very simple Blazor project and for the most part we are simply going to use the default project template that is supplied with the dotnet cli for our app. We are going to generate the code to directory src/front
dotnet new blazorwasm --output src/front
With our project created we can now create our solution file and add our project to it
dotnet new sln --name Sample
dotnet sln "Sample.sln" add "./src/front/front.csproj"
We've created our project so lets do an initial commit and push to our GitHub repository
git commit -am "Initial blazor project creation"
git push
Create a Cake Build script
I have previously discussed and provided an example of how to develop and implement Cake Script in How to write a Cake Build script for ASP.net core project so I won't go in to, too much information and explanation here, other than to say that Cake, is a C# dotnet based scripting language that enables dotnet developers to quickly and easily write build scripts for their applications.
We need to create a build.cake that we will use to add our cake code
touch build.cake
We are going to write a fairly simple script to build, test and publish our application. We'll simply use touch build.cake to create script file then add the following code to it.
#tool "dotnet:?package=GitVersion.Tool&version=5.10.3"
var target = Argument("target", "Default");
var configuration = Argument("configuration", "Release");
string version = String.Empty;

//////////////////////////////////////////////////////////////////////
// TASKS
//////////////////////////////////////////////////////////////////////

Task("Clean")
    .Does(() => {
    DotNetClean("./Sample.sln");
});

Task("Restore")
    .IsDependentOn("Clean")
    .Description("Restoring the solution dependencies")
    .Does(() => {

    var projects = GetFiles("./**/**/*.csproj");
    var settings =  new DotNetRestoreSettings
    {
      Verbosity = DotNetVerbosity.Minimal,
      Sources = new [] { "https://api.nuget.org/v3/index.json" }
    };
    foreach(var project in projects )
    {
      Information($"Restoring { project.ToString()}");
      DotNetRestore(project.ToString(), settings);
    }

});

Task("Version")
  .IsDependentOn("Restore")
   .Does(() =>
{
   var result = GitVersion(new GitVersionSettings {
        UpdateAssemblyInfo = true
    });

    version =  result.FullSemVer.ToString();
    Information($"Nuget Version: { version.ToString() }");
    Information($"Semantic Version: { result.FullSemVer.ToString() }");
});

Task("Build")
    .IsDependentOn("Version")
    .Does(() => {
     var buildSettings = new DotNetBuildSettings {
                        Configuration = configuration,
                       };
     var projects = GetFiles("./**/**/*.csproj");
     foreach(var project in projects )
     {
         Information($"Building {project.ToString()}");
         DotNetBuild(project.ToString(),buildSettings);
     }
});


Task("Test")
    .IsDependentOn("Build")
    .Does(() => {

       var testSettings = new DotNetTestSettings  {
                                  Configuration = configuration,
                                  NoBuild = true,
                              };
     var projects = GetFiles("./tests/Unit/*.csproj");
     foreach(var project in projects )
     {
       Information($"Running Tests : { project.ToString()}");
       DotNetTest(project.ToString(), testSettings );
     }
});

Task("Publish")
    .IsDependentOn("Test")
    .Does(() => {


     var projects = GetFiles("./src/front/front.csproj");
     foreach(var project in projects )
     {
       var publishSettings = new DotNetPublishSettings  {
                                       Configuration = configuration,
                                       NoBuild = true,
                                       OutputDirectory = ".publish",
                                   };
       Information($"Publishing API : { project.ToString()}");
       DotNetPublish(project.ToString(), publishSettings );
     }
});

//////////////////////////////////////////////////////////////////////
// EXECUTION
//////////////////////////////////////////////////////////////////////

Task("Default")
       .IsDependentOn("Clean")
       .IsDependentOn("Restore")
       .IsDependentOn("Version")
       .IsDependentOn("Build")
       .IsDependentOn("Test")
       .IsDependentOn("Publish");

RunTarget(target);
We can test our build script to make sure it works, you may need to ensure you have the Cake Tool installed on your local machine which dotnet tool install Cake.Tool . Once the tool is installed we can execute our build script as follows
dotnet cake ./build.cake
All being well we should get a positive result.
Create a Github Action
We are going to make use of GitHub Actions to execute our build script and deploy our website to netlify. I have previously discussed how to use Cake with Github Actions and we will use the same approach here. We create the folders and files we need as follows
mkdir .github
mkdir .github/workflows
touch .github/workflows/main.yaml

## We can now open the file ready to add the code we need
nano .github/workflows/main.yaml
We can add the following code to our Github Action yaml file.
In our GitHub action there are few things we need to do, the first is to stipulate the build environment we are going to use in this case we are going to use the latest ubuntu, and then we are going to install Dotnet 7 so we can build our Blazor project.
Then we are going to use Cake Action to execute our Cake build script
name: sample-deployment
on:
  push:
    branches:
      - main
  pull_request:
    branches:
      - main
jobs:
  build:
    runs-on: ubuntu-latest
    steps:
      - name: Setup .NET
        uses: actions/setup-dotnet@v3
        with:
          dotnet-version: 7.0.x
      - name: Check out Code
        uses: actions/checkout@v3
        with:
          fetch-depth: 0
      - name: Run the Cake script
        uses: cake-build/cake-action@v1
        with:
            script-path: build.cake
      - name: Publish generated Blazor webassembly to Netlify
        uses: nwtgck/actions-netlify@v2.0
        env:
            NETLIFY_AUTH_TOKEN: ${{ secrets.NETLIFY_API_KEY }}
            NETLIFY_SITE_ID: ${{ secrets.NETLIFY_SITE_ID }}
        with:
            publish-dir: .publish/wwwroot
            production-branch: main
In the script above you may note that we are going to make use of two secrets namely the NETLIFY_SITE_ID and NETLIFY_API_KEY which are needed in order to deploy our site to netlify. We need to create these secrets which we will do in the next step.
We are going to make use Netlify Actions for deploying to Netlify
Create a Netlify Site
We are going to make use of the Netlify CLI to create the website, which essentially is creating the hosting capacity for your site. I use Homebrew to install the Netlify CLI which you can learn more about in How to use Homebrew package manager on Linux . If you haven't got a netlify account sign up for one, and you can create websites for free, it may also be worthwhile reading the Get started with Netlify CLI
Once you have the Netlify CLI installed and have logged in, you can create a site using the CLI as follows
netlify sites:create --name blazor-sample
This will create a website and provide us with some details regarding the website we have just created, we are specifically interested in the Site ID for our purposes. We need to copy the details as we will need them in our next step.
We need to create a repository secret in our GitHub repository, and we can use this using the GitHub CLI as follows
gh secret set NETLIFY_SITE_ID --body paste your site id here --repo garywoodfine/blazorsample
In our next step you will need to create a Personal Access Token in your Netlify Control Panel to enable access to enable deployment. To do this follow the steps on Obtain a token in the Netlify UI . Once you have the token details then we need to create it as a secret on our GitHub repository account.
gh secret set NETLIFY_API_KEY --body paste your token here --repo garywoodfine/blazorsample
Update our .gitignore
We need to exclude a couple of folders from our git repository which a two folders that are created by our build process.
.publish
tools/
Commit and push our code
The final step we need commit and push our code to see the magic happen
 git add .
git commit -am "Deploy the Blazor app to netlify"
git push
This will commit our changes to Github repository, and because we added out GitHub Action code this will kick off our build and deploy task.
using the GitHub CLI we can watch our action as it executes using
gh run watch
Once the run has completed we can get the details of the details of the netlify deployment using
netlify status
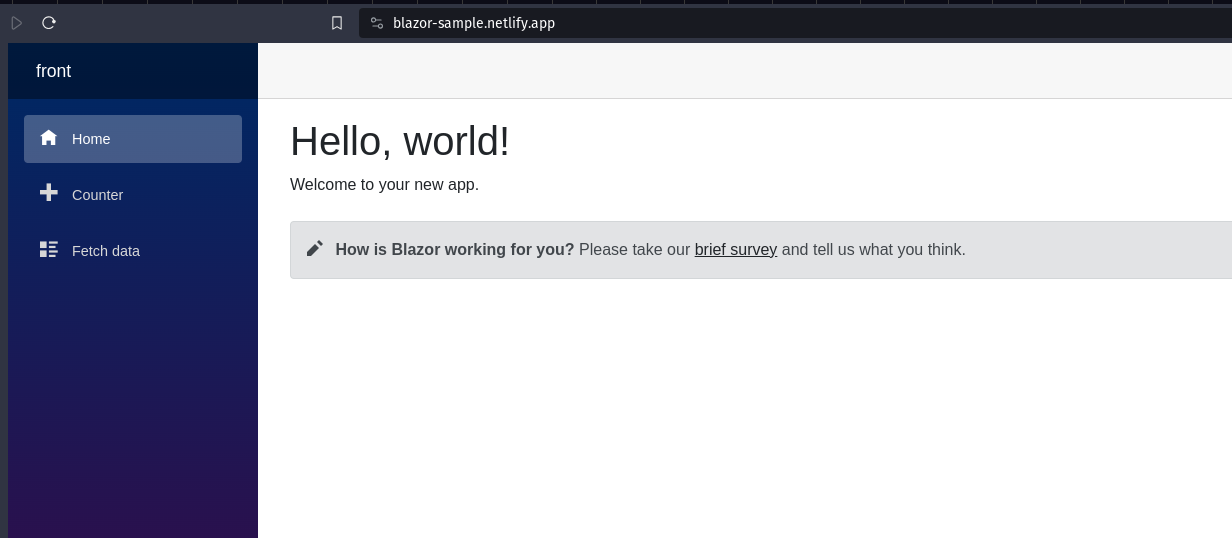
This will provide us with the Site URL that we can click and open our Site in the browser. All being well and if you followed the steps we should see our Blazor app in the browser and it should all work as expected
Conclusion
Blazor WebAssembly can be served as static files. These files can be hosted in static hosting services such as Netlify. Netlify at the time of writing doesn't have the the tooling currently to support building dotnet applications using dotnet 7+ , however using GitHub actions or any other CI/CD tooling we can build and publish our applications using the Netlify CLI tooling
- What is this Directory.Packages.props file all about? - January 25, 2024
- How to add Tailwind CSS to Blazor website - November 20, 2023
- How to deploy a Blazor site to Netlify - November 17, 2023