
Many frequent readers of my blog, colleagues and friends will know that I am a big fan of Jetbrains developer tools and have used them for many years. I have been using Rider a fast & powerful cross-platform .NET IDE for the past the few years and I really love it, its the tool I tend to spend the vast majority of my time in. In fact, for the most part of my day to day development tasks I never have to use anything else.
It was then somewhat of surprise to me when doing a bit collaboration and screen sharing with a colleague, who was using Rider, that always seemed to need to exit rider to perform a number of tasks. It seemed he always needed either open up a terminal window or another tool environment in order to do bits and pieces here and there.
These tasks included, opening a database management studio, Git repo browser and even a Docker Console of some sorts. After an hour or so of watching this I asked why didn't they just use Rider for the same tasks, their reply was that they didn't realise they could!
This made me realise that not everyone appreciates the power that a tool like Rider provides. I have fortunately been able to work with a number of Jetbrains IDE's i.e. Webstorm, PHPStorm, Pycharm, Goland, DataGrip and IntelliJ so I have gained a lot of familiarity with the tools.
In How to use Cake with Rider I provided instructions on how to use one of my favourite build scripts and run them right in your IDE with ease. In this post, we'll build on those foundations and learn how to run Docker-compose files using a similar process.
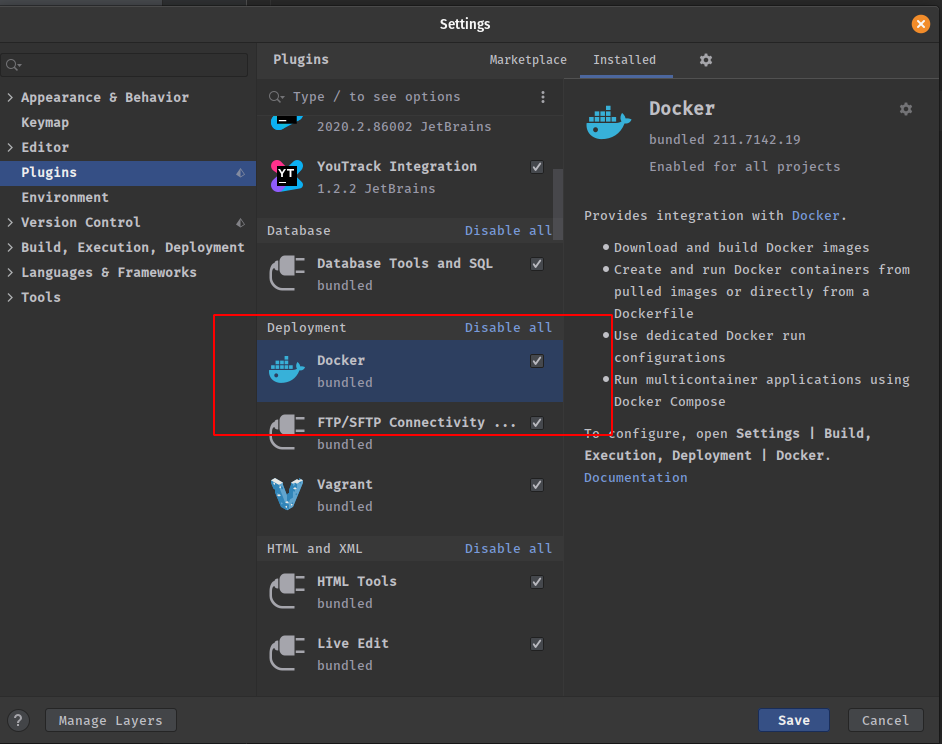
JetBrains Rider provides Docker support using the Docker plugin. The plugin is bundled and enabled by default. For more information, see Docker.
All Code Samples for this Tutorial are available
How to run Docker Compose files
A Docker Compose file is a tool for defining and running multi-container Docker applications. It helps developers to define a service that requires more than one Docker container to function.
Docker Compose builds a stack of applications to run a complete service. The docker-compose.yml file is broken into sections, each section represents a single container which, when combined with the other containers, create the service.
In Implement log monitoring with Seq and Serilog in .net Core we created an initial docker-compose.yml in our sample application, to run the Seq a centralized log file with superpowers. We're going to add to the docker compose file and add a PostgreSQL instance. This will enable us to further develop some additional functionality in our tutorial application.
A complete discussion of the inner workings and reasoning for this file is beyond scope of this guide, however the importance of it is that it includes 2 services that are required by our application to run. In further tutorials.
version: '3.5'
services:
  seq:
    container_name: tutorials_seq
    image: datalust/seq:latest
    ports:
      - 80:80
      - 5341:5341
    environment:
      ACCEPT_EULA: Y
  postgres:
    container_name: tutorials_postgre
    image: postgres
    environment:
      POSTGRES_USER: tutorials
      POSTGRES_PASSWORD: password12@
      PGDATA: /data/postgres
    volumes:
      - postgres:/data/postgres
    ports:
      - "5432:5432"
    networks:
      - postgres
    restart: unless-stopped
networks:
    postgres:
      driver: bridge
volumes:
    postgres:
Add Docker Compose Configurations
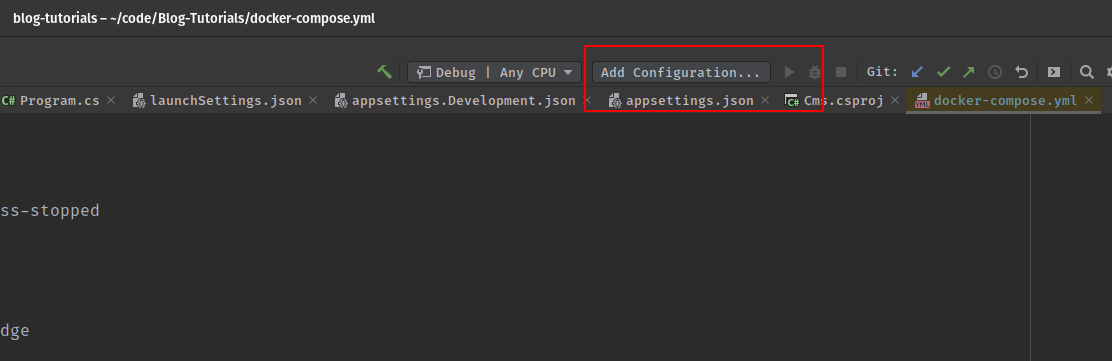
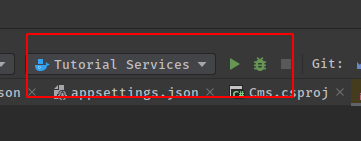
In order to run configure Rider to run docker compose we need to Add Configuration in the top right of the IDE.
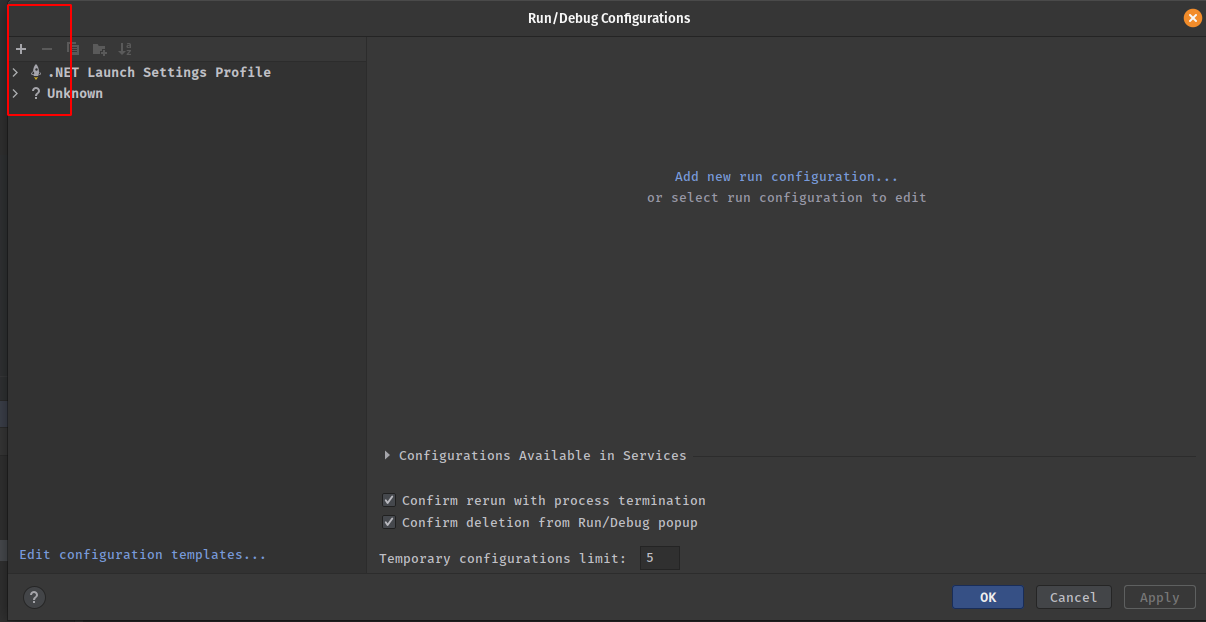
which will open the Run/Debug Configurations dialog window, which we'll use to configure a start up for our Docker Compose.
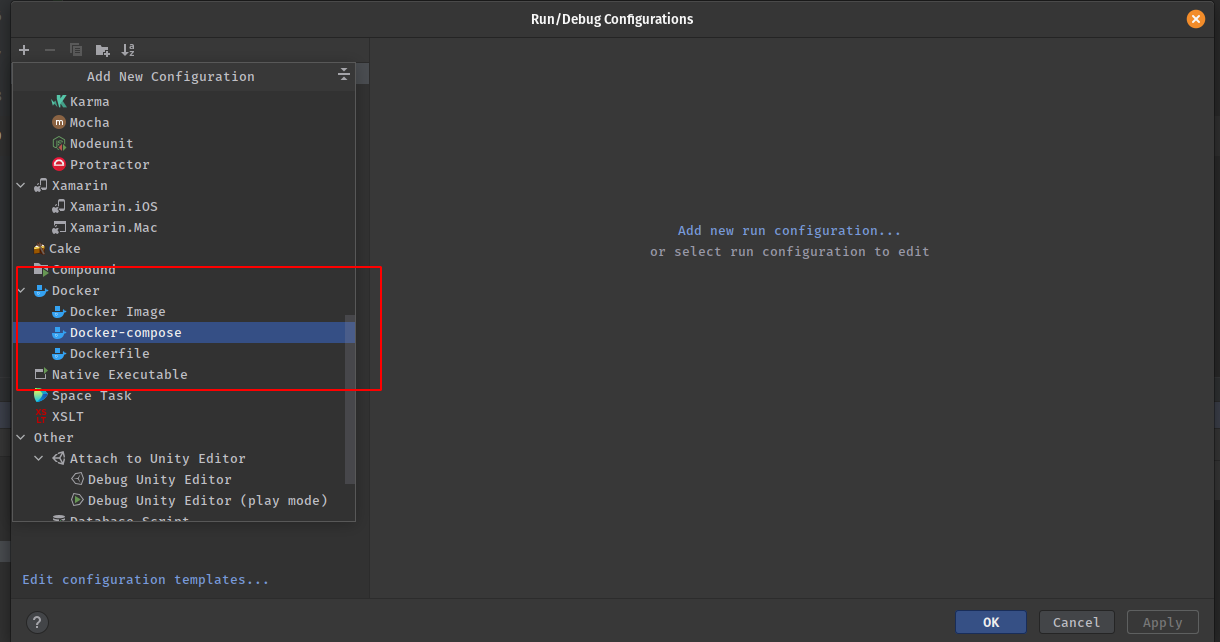
Clicking on the + will open the Add New Configuration dialog then scroll down to the Docker section and select Docker-compose and select it
This will enable you to configure which docker compose file you would like run
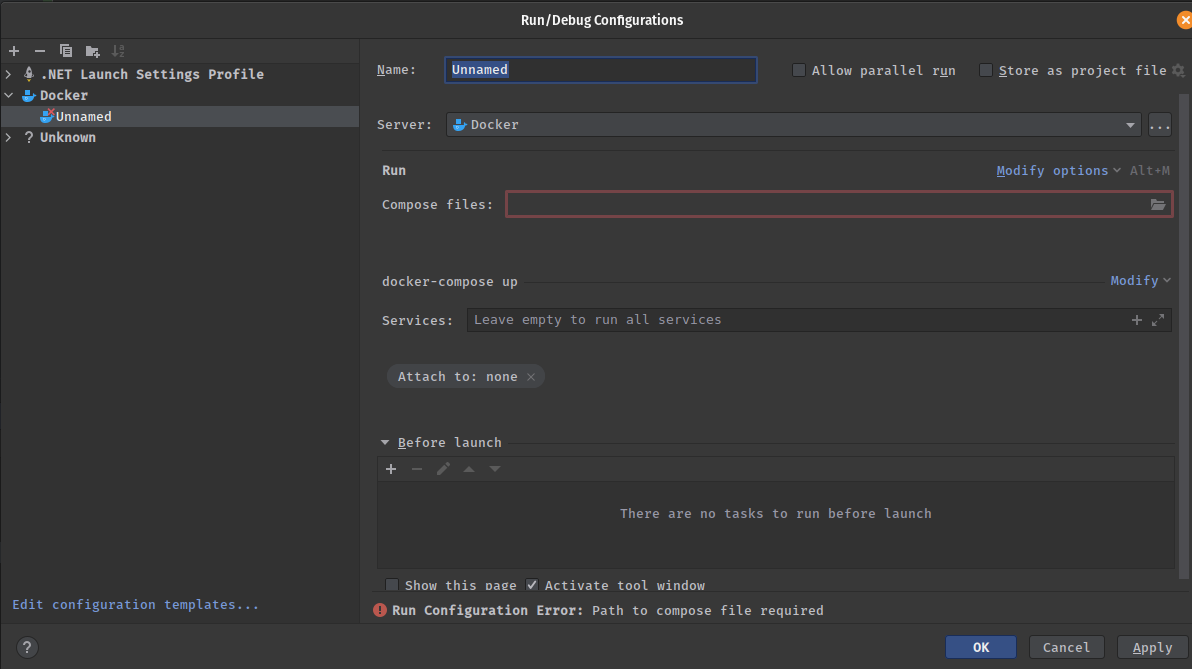
In the Compose files select your file and provide a Name that you would like to refer to your configuration as.

Click apply and the configuration will be saved for you to use
Ensuring you have your configuration selected you can click the green arrow which will run your file.
This will open the services window and you can see your services running and the progress.
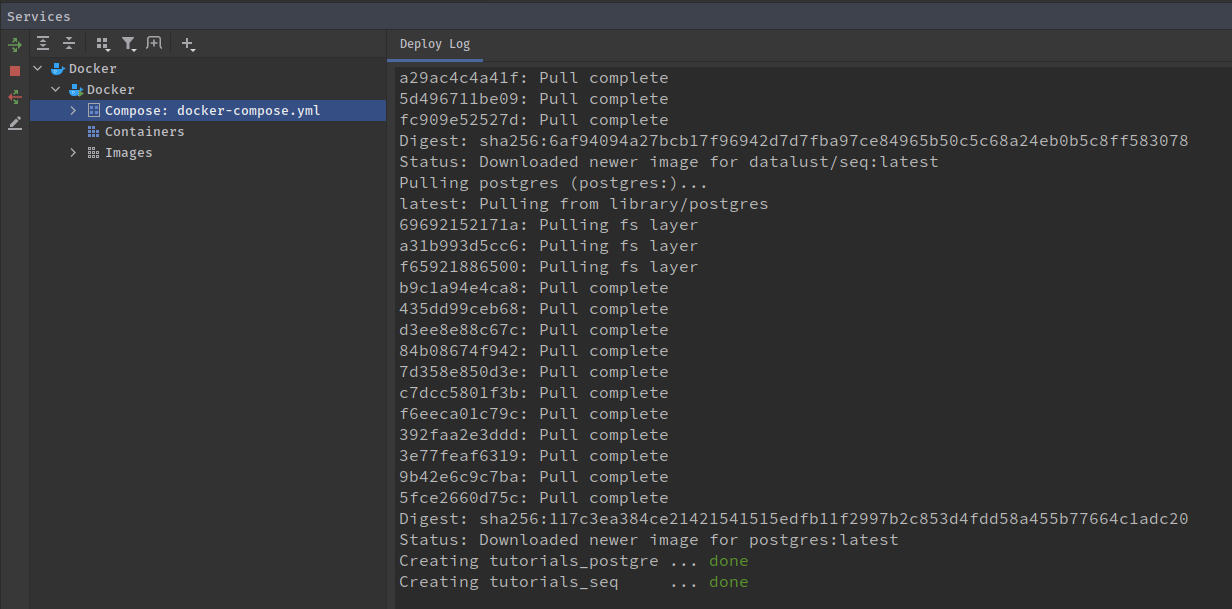
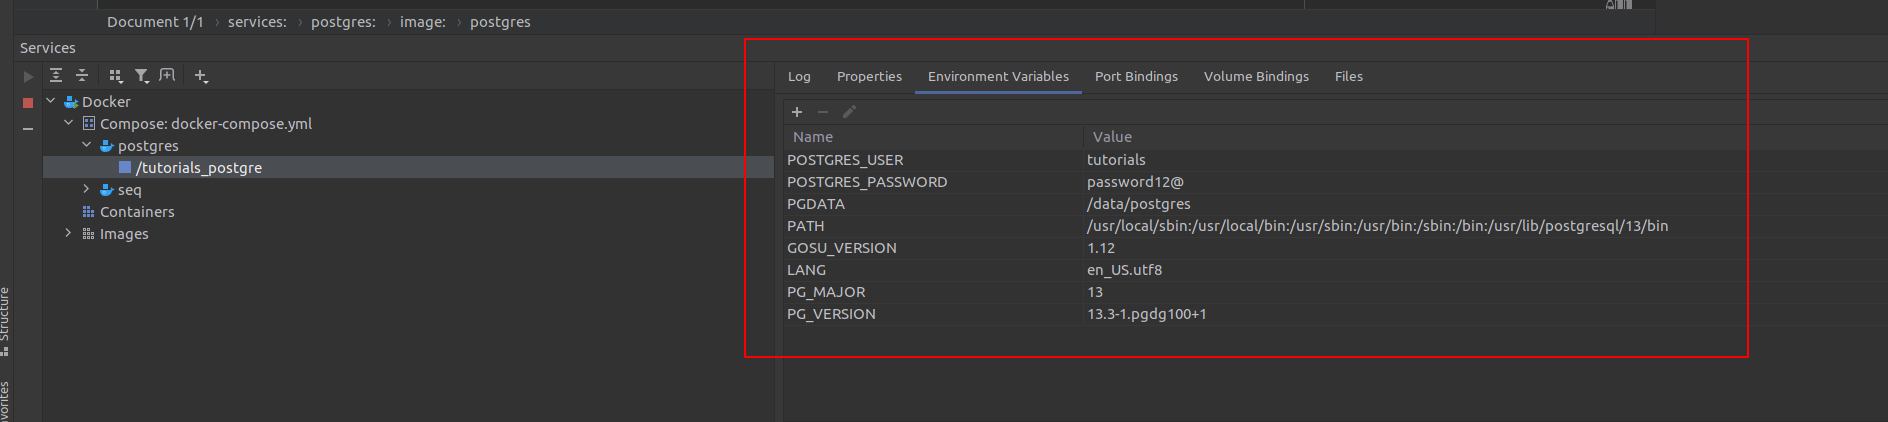
Using the services window will enable you to drill down further into the details of your containers, read the logs generated, inspect environment variables and almost any other details you would like to derive about your containers.
In the screen shot below I have navigated to view the file structure of my container.

How to use Environment Variables
You may have noticed that in our docker-compose.yml we have included Usernames and Password directly in our file. Obviously this is not a great practice and a major security problem.
One of the problems with taking this approach, is that we will be committing our Usernames and Passwords to our Git Repository for everyone to see! In the case of this tutorial we'll be putting it up for display in publicly accessible Git Repository on Github, fortunately the passwords included are not the proper passwords we'd use!
We need to move our Usernames and Passwords to an Environment file that we will not be committing to our source code repository. Our CI/CD environment - in our case we make use of Jetbrains TeamCity has the facility to use any number of Environment files for specific environment so we would configure the actual user name and password there for use during build.
However, we also need to facility to create and manage our own files locally and use them. Fortunately, this is really easy to do using the Docker Plugin.
First we need to create an Environment file in the root of project directory. This could actually be anywhere on your file system, I just like to keep mine with my projects. It is also important to note, that there are a whole number of other strategies you can use to store your environment files. The aim of this tutorial is just to provide an example of how to do it, it should by no means considered as the best practice approach!

Then we can just add the following values to our Environment file
DATABASE_USERNAME=tutorials
DATABASE_PASSWORD=password12@
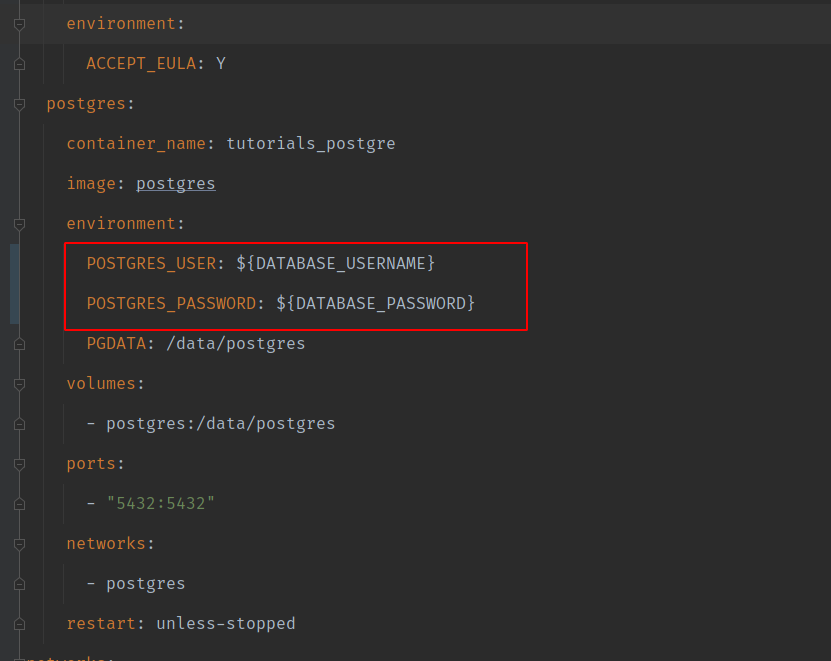
We now need to update the docker-compose.yml to include some Placeholder tags for our Environment Settings values. Check out Environment variables in Compose to gain more of understanding of this.
We will make use the ${ VARIABLE_NAME } tag
Lastly, we just need to update our Docker Compose Run Configuration to make use of Environment File, we can do this by simply Edit Configurations

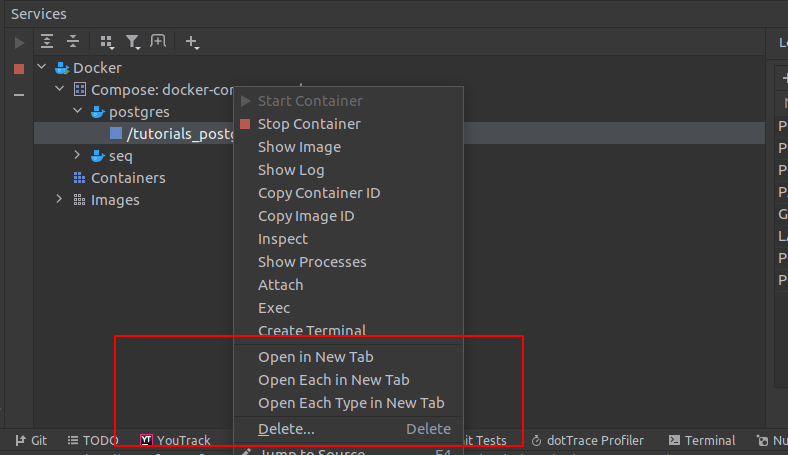
If you the containers are already running from the previous section, you can stop and delete the containers in the Service window by simply navigating to your container and right clicking on and the pop up menu will provide you with all the options you need.
You can then simply select your Docker Compose run configuration and click the Green arrow again then your configuration will run once again but this time making use of the Environment settings you have configured.

Once your services have started up again, you can go inspect the values once again to confirm that they are as you had configured them.
Conclusion
This and many other features of Rider are what makes it my favourite Development IDE's to develop .net core based microservices!

- What is this Directory.Packages.props file all about? - January 25, 2024
- How to add Tailwind CSS to Blazor website - November 20, 2023
- How to deploy a Blazor site to Netlify - November 17, 2023