
I have recently started developing applications using Flutter, and I am really impressed with it and really enjoying it and have been using it to develop Mobile, Desktop and Web Applications using just the one code base. I have to be honest, I've predominantly been using it to develop applications mainly targeting Android, Linux and Web. However, I could just easily configure it to develop the applications to target Mac, IPhone and Windows.
Flutter is awesome, and I totally recommend others to take a look at it. I'm pretty certain you won't regret it also considering that Ubuntu makes Flutter the default choice for future desktop apps this may become of more interest to you fellow Ubuntu Linux based developers.
Installing Flutter on Linux
The flutter documentation pretty much walks you through the process of installing Flutter on Linux and for the most part it is just as easy using Snap store:
I have also simplified the process in Introducing Flutter Mobile application framework if like me, you found the official docs a little too dense.
There are also manual instructions available for those who are still a little weary about using Snaps , ( I know I am )
Once you have flutter installed you have access to the Flutter CLI and most notably the flutter doctor command which displays information about your installed tooling.
You can use any IDE of your choice to develop with Flutter, but as many regular readers will know I will always opt for Jetbrains based IDE when possible and hence why I went ahead and installed Android Studio and also installed the Flutter and Dart plugins. (Check out my guide to How to install Flutter and Dart plugins Android Studio)
One of the final steps of the install and configuration process of flutter is to run the command
This is the step that actually caused me the most difficulties on two of my machines and which I will aim to help you overcome.
Personally, I had two issues, the first one related to me not reading the documentation correctly, or rather most likely not reading at all!
The documentation clearly states as below
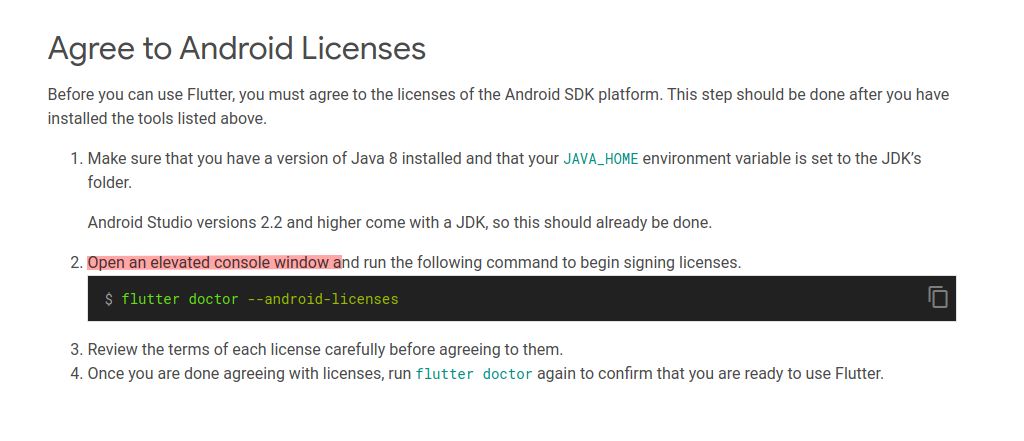
I missed that part! Obviously just going straight to the code! What was actually required here is to
This will first ask you to accept the licenses and then download them. Then once complete simply then exit the elevated permissions by either closing the terminal window or simply typing exit
Once all the licenses have been downloaded you should be able to execute flutter doctor --android-licenses with no issues.
On another machine I experienced another issue, when executing flutter doctor my terminal would report, something similar too
This lead me onto a trial and error process of finding what works, I managed to resolve the problem. In my case these are the few steps I had to do.
Solution 1
install Android SDK Command-line tools from Android SDK Manager
1. Open Android studio and navigate to File > Settings
2. Appearance & Behavior > System Settings > Android SDK
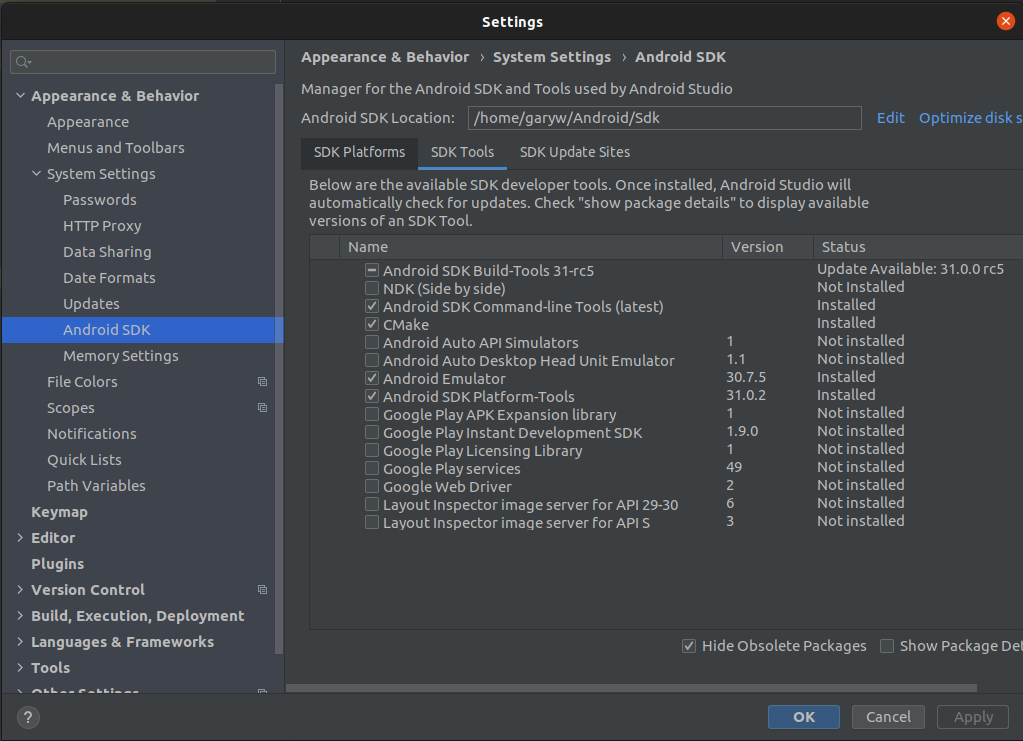
Then select Android SDK Command-line tools & CMake then Apply.
You should then be able to execute the command below without the elevated privileges and accept the licences.
After choosing “yes†for all licenses, the android licenses are accepted.
Solution 2
On another machine ended up having to ensure my android-studio-dir and android-sdk paths were set to empty in my flutter config paths
Doing this step will enforce flutter to inspect the Android studio settings for itself and reset the configuration values.
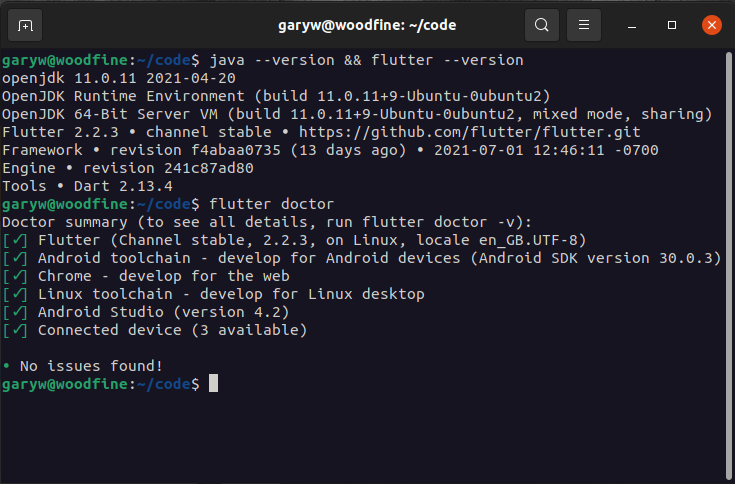
I read some forum posts explaining how to delete JDK 11 and install JDK 8 but this isn't necessary if you follow the steps above I was able to get Flutter running with JDK 11, as the output below can attest.
Conclusion
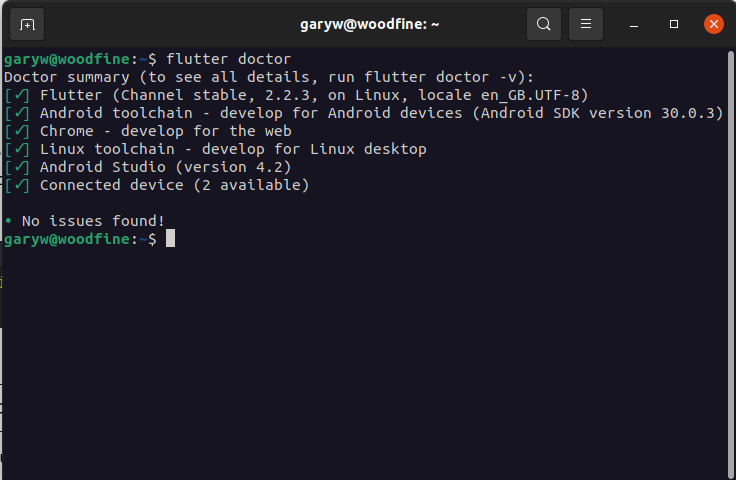
Once I resolved these issues I could execute flutter doctor and confirm that my Flutter configuration was complete and ready for development.
- What is this Directory.Packages.props file all about? - January 25, 2024
- How to add Tailwind CSS to Blazor website - November 20, 2023
- How to deploy a Blazor site to Netlify - November 17, 2023