I have previously introduced Strapi as a great framework to help you quickly build API to use in your projects. Strapi has been designed and developed to enable JavaScript developers to quickly create and build API's in with as little friction as possible. In fact, with just a few clicks you could be up and running with your new API.
In this, post I will cover how to get started making use of Strapi API in your Vue.JS application with GraphQL.
In this sample application, we will develop a simple API to provide a list of Programming languages to our Real-Time application hosted on Google Firebase. The purpose of the API is to basically provide our application with what is typical termed as Standing Data or Reference Data.
Reference data is data that defines the set of permissible values to be used by other data fields.
In our application, we make use of Firestore database for the Real-Time interactions on our website, but we don't want to be storing reference data etc with the Object Database, and we want to the ability to preform CRUD operations on our reference data.
In this use case, it is a good idea, to store your reference data in Relational Database and enable administrators etc to edit this data externally from the Real Time Application. This is where Strapi, comes in handy. Enabling us to effectively create a headless CMS API to feed our application with reference data.
Building reference data API
In our example we have installed Strapi and deployed the initial instance to Heroku so all that we need to do is Build a Content type in our development environment to test. When satisfied we can simply deploy to Heroku.
In this example, we are going to simply use the handy Strapi UI to build our Content Type using the Content Type Builder, this tool is only available in the Development Instance or Strapi Project, so you cannot build Content Types in your production environments.
So If you haven't done so already start up your Strapi project using the strapi dev and then navigate to the Administration Portal i.e. https://localhost:1337/admin and login using whichever administration account you configured.
Once you have successfully logged in, in the Side Menu navigate to Plugins -> Content Type Builder .
In the screen that opens click the + Add A Content Type link. A new pop up screen will be displayed.
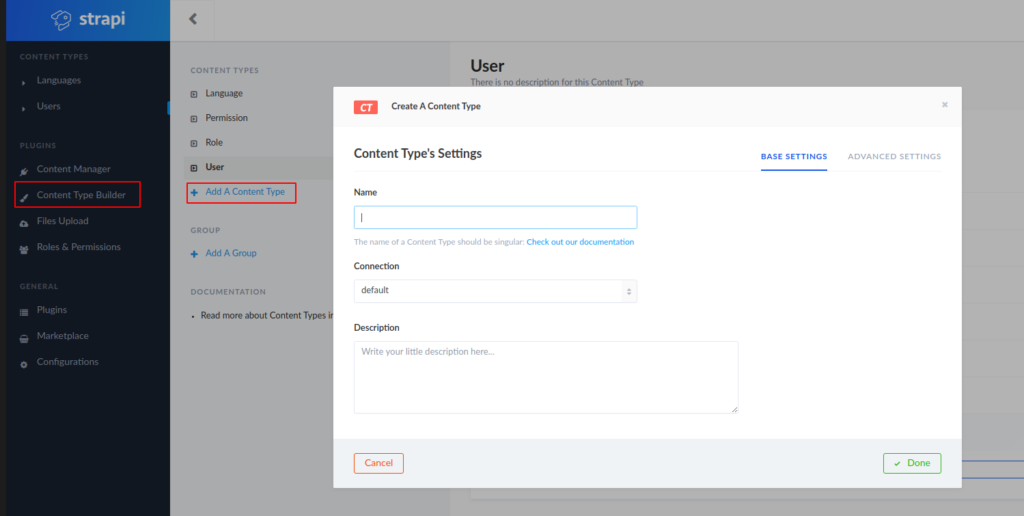
Give a meaningful name to your new Content Type, in our case we going to create two Content Types : Language and Framework , which relate to Programming Languages and Software Development Frameworks.
So complete the details to ensure you provide as much useful information to not only your future self, but also other people who will possibly use or even continue develop your API.
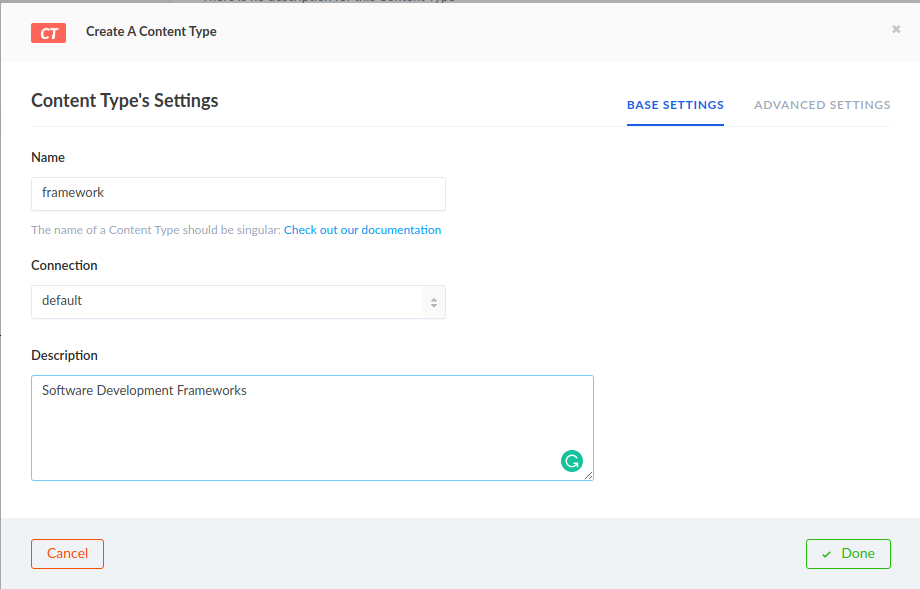
Once you have completed all the details click Done
A Philosophy of Software Design
how to decompose complex software systems into modules that can be implemented relatively independently.
Add your fields
You are now ready to add your fields you need in your content type. Strapi provides a rich selection of field types you can use, and they are really worth exploring.
In our case, and for the initial release of functionality we are simply going to start off with 3 fields in each Content Type. We know we are going to expand on these later, but at this stage of the development we don't know what the additional data each content type will require.
We will focus on implementing the Minimum Viable Product (MVP) at this stage of the development. This is also where a tool like Strapi comes in really handy by enabling you to iterate faster on your API's.
Our two Content Types are going to have identical fields at this stage.
| Name | String |
| Description | Text |
| Active | Boolean |
Our Name field we are going to add some Advanced Settings as detailed.
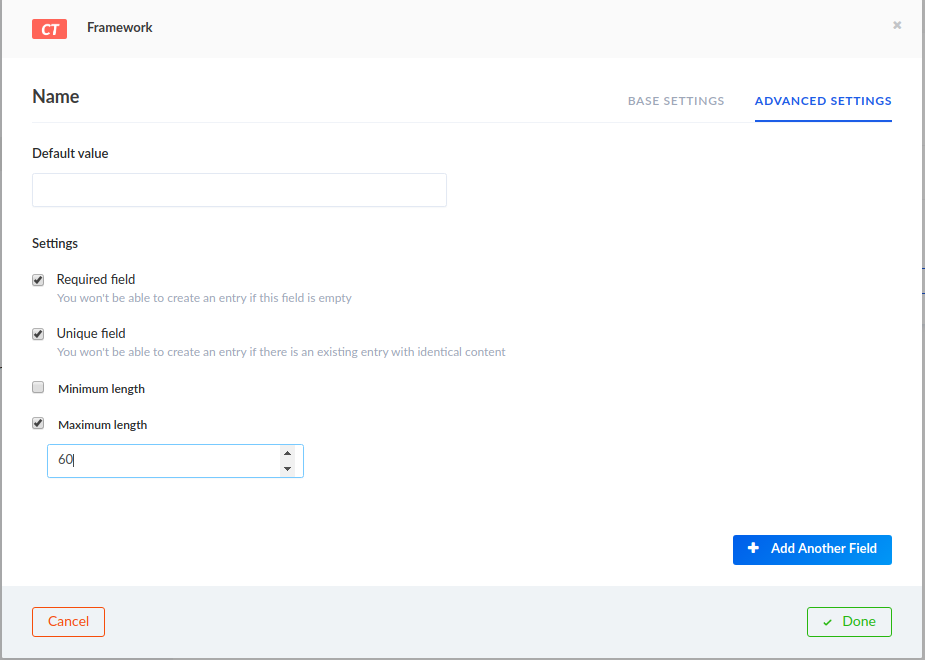
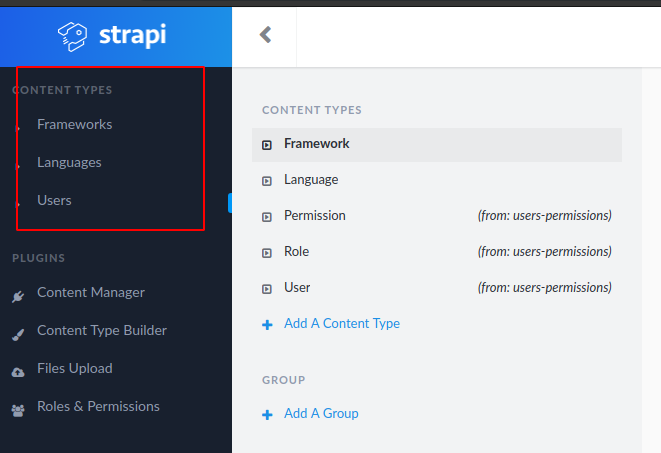
Once you have completed Adding your Fields and designing your content type Click Save. Your screen should then refresh and you will notice in the Top Left corner of your screen your new Content Types will become available.
Code generated
Strapi has also generated the JavaScript code for you for your initial Content-Types, in your Development Project, go ahead and check out the code it has generated. If you navigate to the ~/api/ folder in your project directory, you see you new Content Types have been generated.
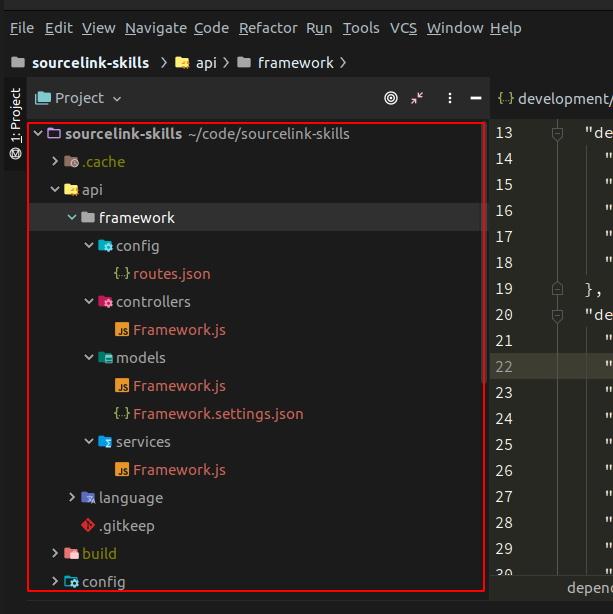
You can also check your new tables in your database. In my case, we are using Postgres and I will be using Datagrip view my database.
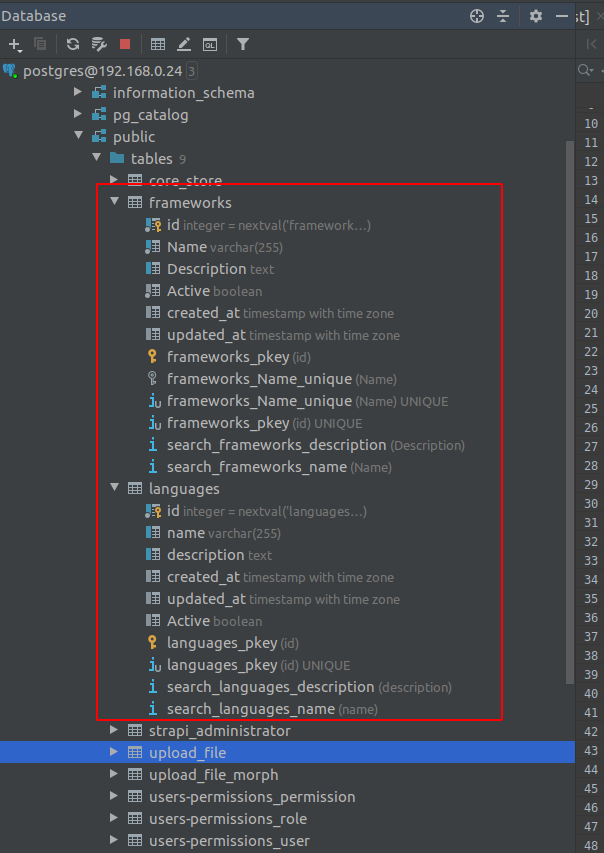
You'll notice that your new tables will automatically have Create_at, Updated_at and Id fields provided.
Add sample data to your content types
You can now use the Strapi UI to add whatever sample data you want to your system. To do so is a really & convenient with Strapi.
Simply navigate to your chosen content type and click the Add New ....

Edit permissions to your content types
You can easily add authentication to ensure your new API routes are either restricted or open to users.
In our instance, we are just going to make our new routes open and accessible by the public, only providing Read access though.
To this we will navigate to Roles & Permissions in the Strapi UI and select Public. We will then only enable access to the find method for each of our Content Type Actions.
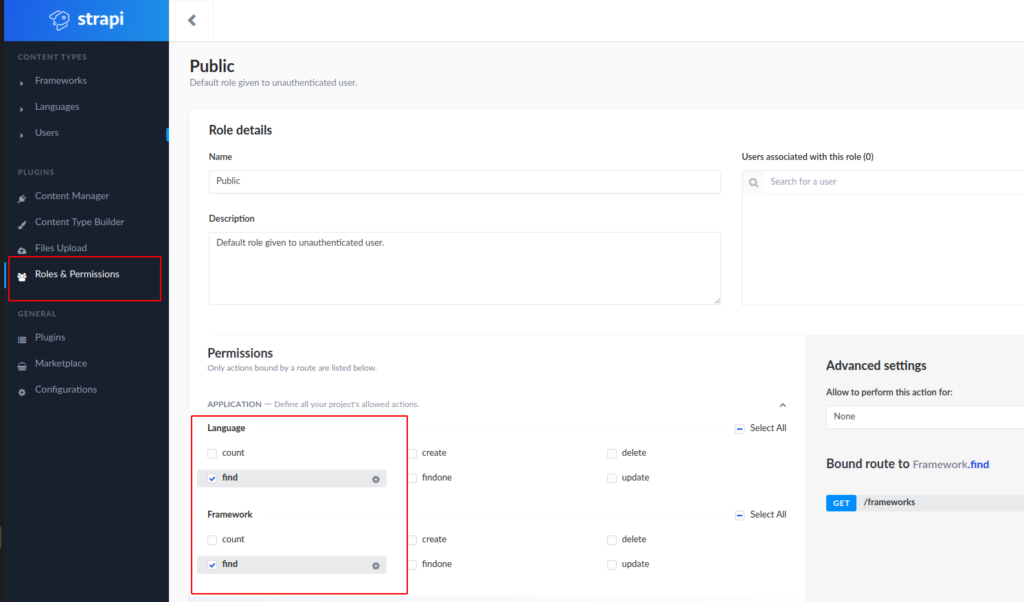
This will be all for now. In later tutorials we will be adding some additional security, but for now this will suffice.
Using GraphQL
Now for the feature, that I personally think is really cool, is the fact that Strapi is really easy to configure to make use of GraphQL.
By default Strapi create REST endpoints for each of your content types. With the GraphQL plugin, you will be able to add a GraphQL endpoint to fetch and mutate your content.
Its really easy to install using GraphQL either by using your favourite package manager i.e. Yarn or Npm, but in this example we are going to use the handy new strapi CLI feature.
In your terminal window simply execute
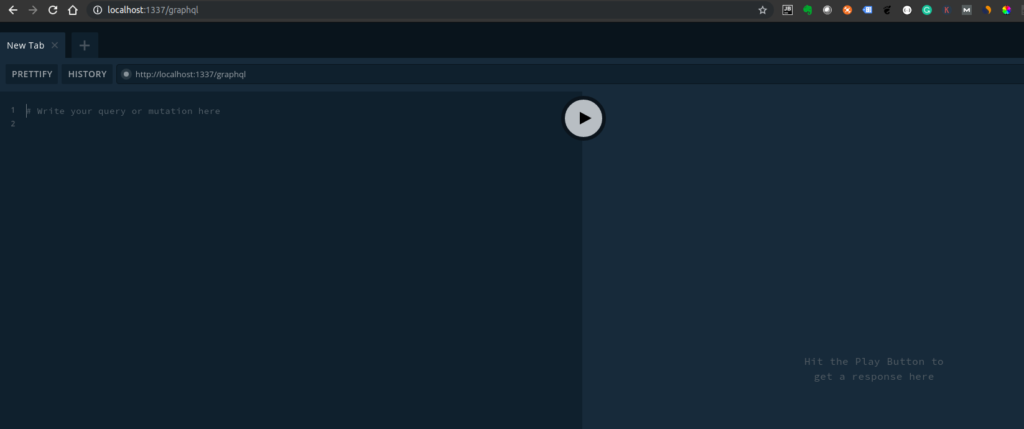
Then it is just a case of restarting your app and open your browser at http://localhost:1337/graphql
You should see the interface (GraphQL Playground) that will help you to write GraphQL query to explore your data.
Information
The Playground is enabled by default for both the Development and Staging environments, however it is disabled in production.
You can enable the playground in Production by changing the config option playgroundAlways to true.
I won't go into detail about how to use GraphQL, as to be honest that it probably a topic for a whole series of blog posts! However , I will just quickly provide sample queries which we will be using in our application.
Initially we will just test this GraphQL query to only get the programming languages in our list that have been marked as active. This serves only check to see how strapi works with GraphQL and not a true representation of GraphQL query capabilities.
In the query window enter the following
We should see the results in the query window.

Summary
We now have an API ready to be used with GraphQL also with an initial REST Interface. All this in just a matter of a few minor adjustments.
- What is this Directory.Packages.props file all about? - January 25, 2024
- How to add Tailwind CSS to Blazor website - November 20, 2023
- How to deploy a Blazor site to Netlify - November 17, 2023
