
An essential tool for any modern development platform is a mechanism through which developers can create, share, and consume useful code. Often code is bundled into "packages" that contain compiled code libraries along with other content needed in the projects that consume these packages. Most of the popular software development programming languages and platforms have a Package Management System or Package Manager, which is a collection of software tools that automate the process of installing, upgrading, configuring, and removing computer programs for a computer's operating system in a consistent manner.
For Developers, using the .net framework, Nuget is a free and open-source package manager designed for the Microsoft development platform. Nuget hosts large numbers of free, open source re-usable components available around the web which can be re-used in projects.
In this post we will walk through the process of creating a Nuget package using .NET core and discuss some advanced concepts to consider when developing and maintaining a nuget package with .net core, including setting up a Ci/CD pipeline using AppVeyor to automate the deployment of your nuget package to Nuget.org package manager.
Over the years I have utilized a number Nuget Packages in projects, making use of other developers code and effort to enable jump start my own projects. I thought I would take the opportunity to break my duck, and create my own Nuget Packages.
What is Nuget
NuGet is a free and open-source package manager designed for the Microsoft development platform
The long and the short of it is if you're looking for a way to share a library for .NET Framework or .NET Core projects, NuGet is an excellent way to distribute it.
Starting with Visual Studio 2017, NuGet comes pre-packaged with Microsoft.NET.Sdk projects. NuGet packages are used to share runtime libraries, build tools, frameworks and even entire applications.
Creating dotnet pack
Understanding dotnet pack
dotnet pack - Packs the code into a NuGet package. The documentation for dotnet pack is easy to read and follow.
In fact, I was able to pack and publish my initial nuget package with very little knowledge. However, as we all know a little bit of knowledge is a dangerous thing.
Create and publish nuget package
Using the .net core cli the process of creating and publishing a nuget package to Nuget.org is a relatively easy task, which can be achieved using the following commands and switches
dotnet pack -c Release /p:PackageVersion=1.0.0
cd bin/Release
dotnet nuget push Threenine.Data.1.0.0.nupkg  -k <nuget api key>  -s https://www.nuget.org/
In line 1 we create the package, assuming you are in the Directory of your .csproj , the once complete you can change directory to your bin/Release folder, in the example we have explicitly stated we want a Release build, the default is Debug.
In line 3 we actually publish it to the nuget.org, the API key is the one you will create when you Register an account on the website.
Adding MetaData about your package
If you followed the steps above and have added your package to nuget then browse to it, that your package page may look a little bland without displaying any relevant information about your package to your users.
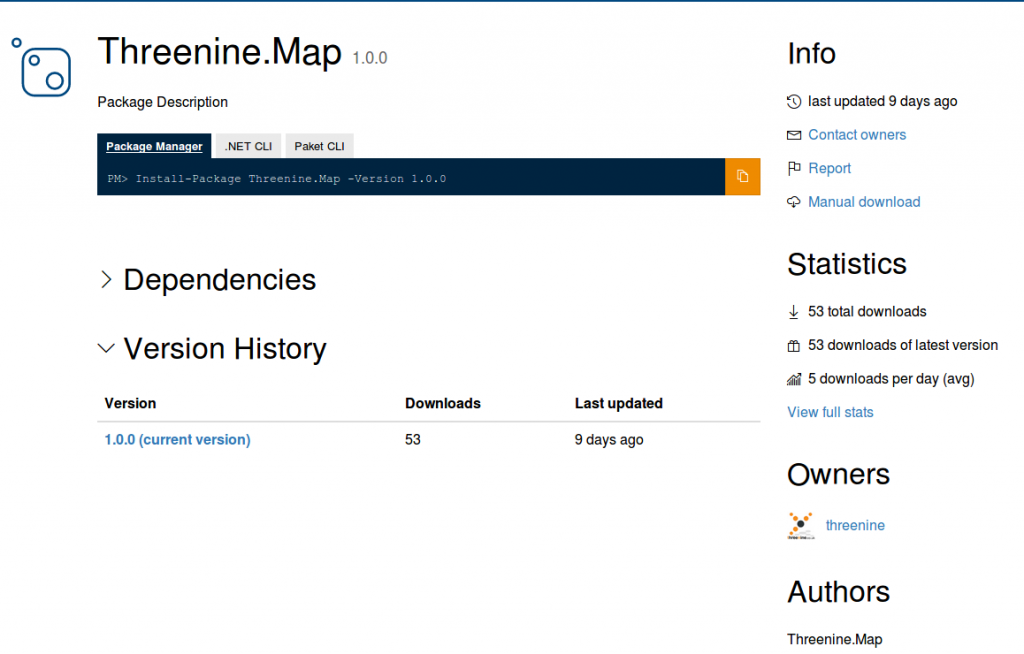
In order for people to find your product to use it, you will need to add Metadata to not only describe your product but also provide more relevant detail about it.
Visual Studio Code
Add nuget metadata to your .csproj file by opening your file in the code editor then
<PropertyGroup>
    <TargetFramework>netstandard2.0</TargetFramework>
    <GeneratePackageOnBuild>true</GeneratePackageOnBuild>
    <Version>1.0.2</Version>
    <PackageRequireLicenseAcceptance>true</PackageRequireLicenseAcceptance>
    <Company>Three Nine Consulting Limited</Company>
    <Authors>Gary Woodfine</Authors>
    <PackageProjectUrl>https://garywoodfine.com/generic-repository-pattern-net-core/</PackageProjectUrl>
    <PackageIconUrl>http://static.threenine.co.uk/threeninemap_icon.png</PackageIconUrl>
    <PackageTags>generic repository</PackageTags>
    <Copyright>Copyright ©2018 Three Nine Consulting Limited</Copyright>
    <Description>A generic repository wrapper library for entity framework core</Description>
    <PackageLicenseUrl>http://opensource.org/licenses/MS-PL</PackageLicenseUrl>
    <NeutralLanguage>en</NeutralLanguage>
    <RepositoryUrl>https://github.com/threenine/ReflectMap</RepositoryUrl>
    <RepositoryType>git</RepositoryType>
  </PropertyGroup>
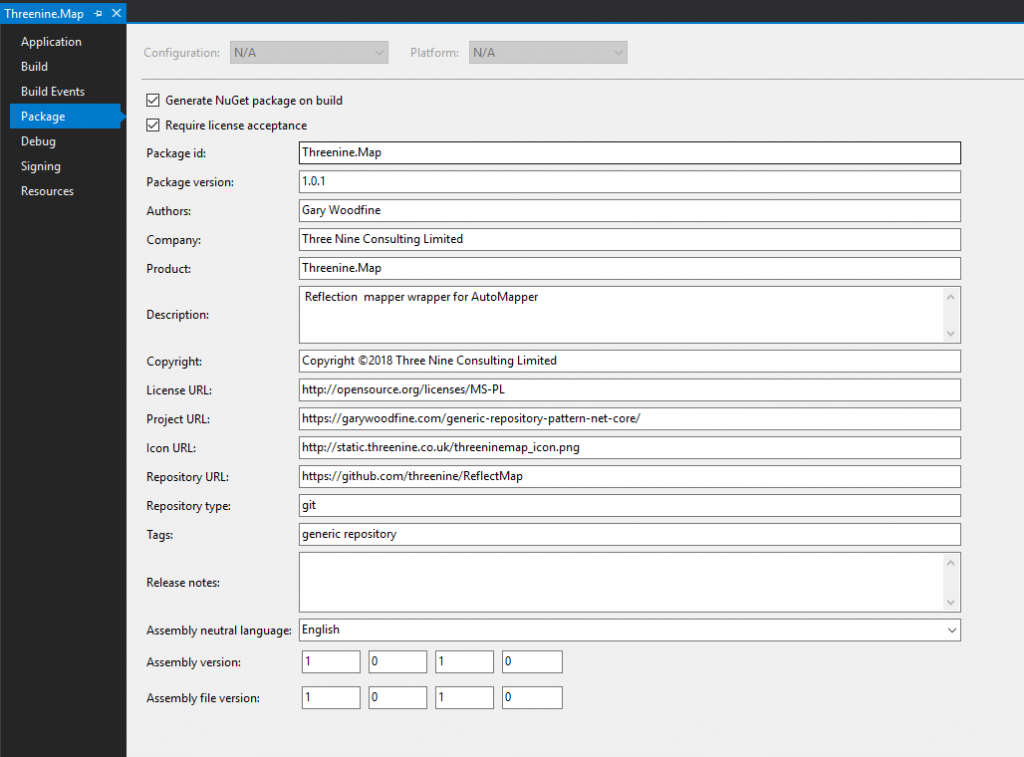
Visual Studio 2017
In Visual Studio adding these details is even easier and doesn't require you to get your hands dirty with XML . All you need to do is right click on your .csproj file and select Properties, then select Package.
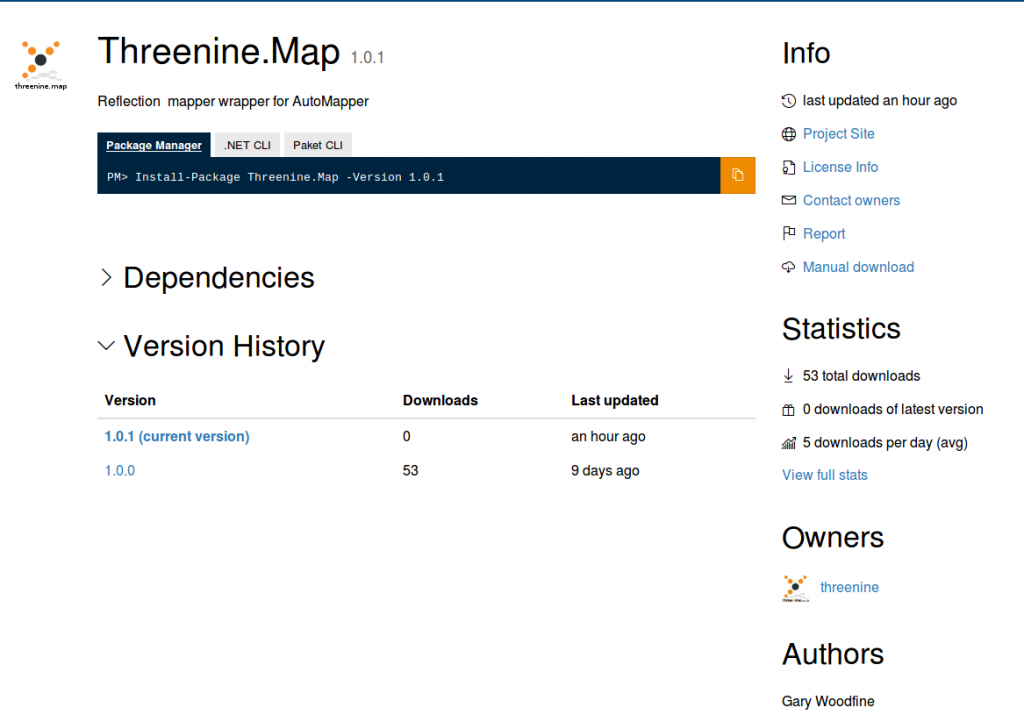
After saving, we can now create a new package and publish it. Once complete and the package has been validated the package page on the nuget.org will display the metadata.
We now have a slightly more visually appealing product listing page. Check out NuGet metadata properties to gain a better understanding of the metadata properties.
Continuous Improvement , Integration & Deployment
The last thing any developer wants is some kind of manual testing and deployment process. Primarily due to the fact of software being software we know that it is going to change. Undoubtedly as we and other users start making use of libraries there will undoubtedly be changes and enhancements required. We will need to automate the process of keeping the package up to date.
After reading A Field Guide To Continuous Delivery I always search for ways to enhance my software delivery process with Continuous Delivery, a methodology that helps any team deliver software faster, more efficiently and painlessly.
Good Continuous Delivery allows you to spend more time writing quality software, and the book details a number of best practices worth adopting that will facilitate great code, from feature toggles to test-driven development.
Continuous Delivery allows teams to get software into the hands of their customers at a much faster rate by encouraging greater communication, more frequent collaboration and by automating as much of your deployment process as possible.
I decided to try out AppVeyor for this process. I had no previous experience of AppVeyor and thought it might be a good opportunity to get to know a new tool.
Why Appveyor
AppVeyor is a paid service with a free tier specifically for Open Source projects. In this example we will use the free tier, due in part the intention for my nuget libraries are to be Free Open Source Systems. However the pricing structure seems pretty reasonable for enterprise projects.
Just 5 minutes into reading the documentation I managed to get the gist of how it works
- Sign up for an account
- Import a GitHub repository
- Add a .yml file to your repository
- Watch builds happen
Once you have signed up and imported your repository you will need to add a appveyor.yml to the root directory of your source code. The basic yaml to build a .net core project.
version: '1.0.{build}'
image: Visual Studio 2017
branches:
  only:
  - master
init:
  # Best practice (Windows line endings different to Unix/Linux)
  - cmd: git config --global core.autocrlf true
install:

before_build:
  # Display .NET Core version
  - cmd: dotnet --version
  # Display minimal restore text
  - cmd: dotnet restore ./Threenine.Data/Threenine.Data.csproj --verbosity m
build_script:

  - cmd: dotnet build ./Threenine.Data/Threenine.Data.csproj
after_build:
  # For once the build has completed

on_finish :
  # any cleanup in here
deploy: off
We should be able to build our application after a check in into the main branch.
We can modify our yaml slightly, to incorporate some building and packaging and then publish it to nuget.
Appveyor have documented the publishing aspect for you, so it is really easy to incorporate this into your script, with a few mminor tweaks. Check out the documentation on Publishing to NuGet feed
One of the most important points is to use the Appveyor encyrption tool to encrypt your API Key before adding it to your yaml file. You should also ensure you create a separate API key in your Nuget account that you will use for this purpose. Don't use your main API key.
version: '1.0.{build}'
image: Visual Studio 2017
branches:
  only:
  - master
init:
  # Best practice (Windows line endings different to Unix/Linux)
  - cmd: git config --global core.autocrlf true
install:
  - appveyor DownloadFile https://dist.nuget.org/win-x86-commandline/v4.0.0/nuget.exe
before_build:
  # Display .NET Core version
  - cmd: dotnet --version
  # Display minimal restore text
  - cmd: dotnet restore ./Threenine.Data/Threenine.Data.csproj --verbosity m
build_script:
    - cmd: dotnet build ./Threenine.Data/Threenine.Data.csproj -c Release
    - cmd: dotnet pack  -c Release /p:PackageVersion=1.0.{build}
artifacts:
- path: ./Threenine.Data/bin/Release/*.nupkg
  name: NuGet

deploy:
- provider: NuGet
    api_key:
    secure: FU841XC5Cujzqo+j12T4vI0bngL5ScxwCK8VT5OuuYi7aWw+0utt+Bpv3/5tr82Q
  skip_symbols: true
Conclusion
The process of creating and publishing nuget packages is extremely easy and with a little bit of extra investment you can automate the process really quickly. By incorporating some concepts of CI/CD you can ensure that whenever you make ammendments and enhancements to your library your users will be notified and can update to the latest version of your package when needed.

- What is this Directory.Packages.props file all about? - January 25, 2024
- How to add Tailwind CSS to Blazor website - November 20, 2023
- How to deploy a Blazor site to Netlify - November 17, 2023