AngularJS comes pre-packaged with a number of great directives that really make working with AngularJS really easy and productive. However, as with all programming languages to be really productive you need to create your own reusable components that are specific to your project. In this example I will show you how I create a really simple re-usable component for a module in an application
The component will just about complicated enough to illustrate all the elements of creating a directive, and provide an explanation of each step. In the application I have a number of forms that require validating and display an error or confirmation message depending on the state of the data, a common requirement in any application.
Currently this functionality is implemented using a series of HTML components and Angular Directives which I have to copy and paste on the forms.
<div data-ng-show="success" class="text-center text-success">
 <strong>Profile Saved Successfully</strong>
</div>
<div data-ng-show="error" class="text-center text-danger">
 <strong data-ng-bind="error"></strong>
</div>
The problem with this approach is if I ever want to change the look and feel or implement some common behaviour I would need to edit a number of files, which is not good for my sanity. So wrapping this up in a common component to be re-used throughout the module is a good idea.
Create a Directive
The first thing we need to do is register a new directive into our module. We do this by creating something that is called Directive Definition Object, which is used to configure the directives behaviour. We will also need to create some UI templates and a number of other tasks. However, one of the great things about utilizing a framework like MEANJS is that it comes packages with Yeo Man generators to automate the heavy lifting work for you! Allowing you to focus on just developing what you need. To generate an AngularJS directive, we simply type the following command in the terminal window.
yo meanjs:angular-directive
In my case I'll generate my module with the name alertpane
yo meanjs:angular-directive alertpane
This will create the bare-bones structure needed for the directive. I chose to create my directive in the Users module, so I can use it within the module. [ebs_well type="well-sm"]
I use WebStorm - The smartest JavaScript IDE - on Ubuntu desktop to develop all my JavaScript Applications [ebs_button style="btn-info btn-lg btn-block" icon="glyphicon glyphicon-download" align="left" type="link" target="true" title="Download WebStorm " link="https://www.jetbrains.com/webstorm/"]
[/ebs_well] Executing the generator will result in a new JavaScript File being created 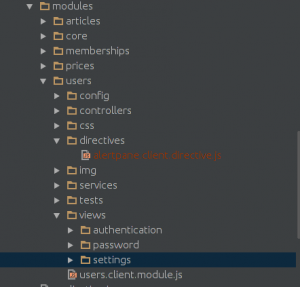 The code contained in the file will look like this.
'use strict';

angular.module('users').directive('alertpane', [
	function() {
		return {
		template: '',
			restrict: 'E',
			link: function postLink(scope, element, attrs) {
				// Alertpane directive logic
				// ...

				element.text('this is the alertpane directive');
			}
		};
	}
]);
We are now ready to focus on actually implementing our new component. Even though the generator has done a great job of generating the bar-bones we need, there are a few things I would like to change here.
template
The one thing is the generator, creates a template: parameter which enables you to create text string containing your HTML template which in itself is ok, but I much prefer making use of the templateUrl: which enables me to create another physical file with the template design. This helps me to design the template without the need to complex string concatenation.
templateUrl
In the View folder we'll create a new HTML file called alertpane.client.view.html and we'll instruct the directive to make use of this template by using the templateUrl variable
angular.module('users').directive('alertpane', [
   function() {
      return {
         templateUrl: 'modules/users/views/settings/alertpane.client.view.html',
         restrict: 'E',
         scope: {
            type:'=type',
            message: '=message'
         }

      };
   }
]);
Restrict
The eagles eyes among you will have noticed that generator also include a restrict attribute, and may be wondering what this means. Basically there are 4 methods we can use to enable how we attach a directive. [ebs_table width ="100%" style ="table-striped table-bordered" responsive ="true"] [ebs_table_head] [ebs_th_column]Restriction Property[/ebs_th_column] [ebs_th_column]Values[/ebs_th_column] [ebs_th_column]Usage[/ebs_th_column] [/ebs_table_head] [ebs_table_body] [ebs_table_row] [ebs_row_column]Attribute (default) [/ebs_row_column] [ebs_row_column]A[/ebs_row_column] [ebs_row_column]
[/ebs_row_column] [/ebs_table_row] [ebs_table_row] [ebs_row_column]Element name [/ebs_row_column] [ebs_row_column]E[/ebs_row_column] [ebs_row_column][/ebs_row_column] [/ebs_table_row] [ebs_table_row] [ebs_row_column]Class[/ebs_row_column] [ebs_row_column]C[/ebs_row_column] [ebs_row_column] [/ebs_row_column] [/ebs_table_row] [ebs_table_row] [ebs_row_column]Comment[/ebs_row_column] [ebs_row_column]M[/ebs_row_column] [ebs_row_column][/ebs_row_column] [/ebs_table_row] [/ebs_table_body] [/ebs_table] It is possible to combine more than one restriction at the same time by just using a subset combination of EACM . If the directive is applied without the restrictions configuration, it will be ignored by the framework.
scope
I need the ability to pass in different values depending on the type of information I want to display to the user. I will create a some new properties in the directive using the scope object. There are 3 ways to configure the directive scope: [ebs_table width ="100%" style ="table-striped table-bordered table-hover" responsive ="true"] [ebs_table_head] [ebs_th_column]Prefix[/ebs_th_column] [ebs_th_column]Details[/ebs_th_column] [/ebs_table_head] [ebs_table_body] [ebs_table_row] [ebs_row_column]@[/ebs_row_column] [ebs_row_column]This prefix passes the data as a string[/ebs_row_column] [/ebs_table_row] [ebs_table_row] [ebs_row_column]=[/ebs_row_column] [ebs_row_column]This prefix creates a bidirectional relationship between a controller's scope property and a local scope directive property[/ebs_row_column] [/ebs_table_row] [ebs_table_row] [ebs_row_column]&[/ebs_row_column] [ebs_row_column]Binds the parameter with an expression in the context of the parent scope. Useful if you would like to provide some outside functions to the directive[/ebs_row_column] [/ebs_table_row] [/ebs_table_body] [/ebs_table]
link
The link function does for a directive what a controller does for a view - it defines APIs and functions that are necessary for the directive, in addition to manipulating and working with the DOM (Document Object Model). AngularJS executes the link function for each instance of the directive, so each instance get its own, fully contained business logic while not affecting any other instance of the directive. The link function gets a standard set of arguments passed to it that remain consistent across directives. They may be similar too:
function (scope, element, attrs) {
}
HTML Template
Our display template is very simple, to keep in with the theme of keeping this Directive very simple. In the template we will make use of Angular-Bootstrap alert component. and will essentially just be passing some parameters to it. We'll create a alertpane.client.view.html file and place it view 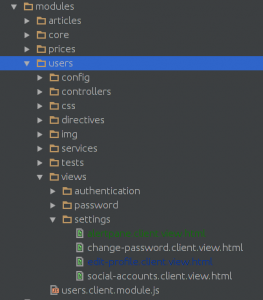
<div>
    <alert type="{{type}}" ng-bind="message"></alert>
</div>
Nothing terribly complicated here, only that we will be passing 2 parameters to this template type & message.
update the profile edit page
We will also need to update the edit profile page to make use of our new directive, will add new line underneath our button, 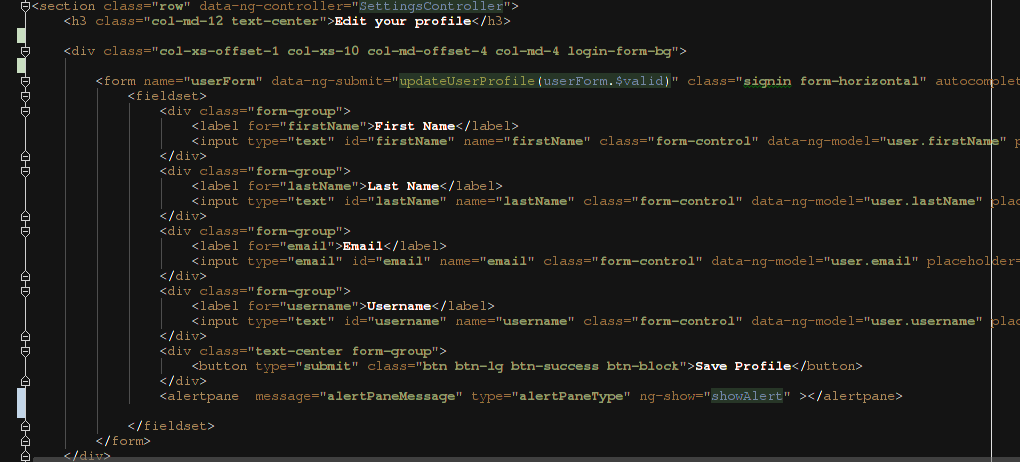 We will also now update our Profile update controller method make use of this new directive.
		// Update a user profile
		$scope.updateUserProfile = function(isValid) {
			if (isValid) {
				$scope.success = $scope.error = null;
				var user = new Users($scope.user);

				user.$update(function(response) {
					$scope.success = true;
					Authentication.user = response;
					$scope.showAlert = true;
					$scope.alertPaneType = 'success';

					$scope.alertPaneMessage = 'Profile updated successfully';
				}, function(response) {
					$scope.showAlert = true;
					$scope.alertPaneType = 'danger';

					$scope.alertPaneMessage = response.data.message;
					console.log($scope);

				});
			} else {
				$scope.submitted = true;

			}
		};
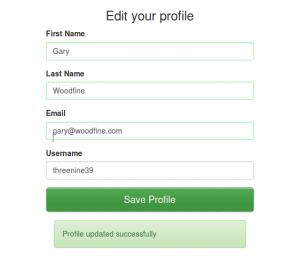
Now we run the application we should now see the results of our labours If we don't complete all the required fields we should see an error message appear if we submit, 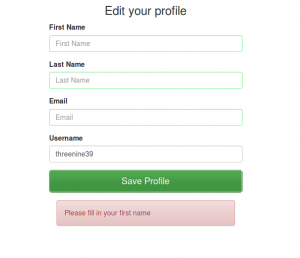 And if the form is completely valid we should see a nice confirmation message.
 Conclusion
This tutorial was not meant to provide with a how to guide to build the most earth shatteringly complicated directive, it was intentionally kept as simple as possible, but tried to ensure we touched on as many concepts regarding developing AngularJS directives as possible.
I am well aware of the coding practices may not be the best in this example, however I do have some follow up tutorials planned where in we delve further into the complexities of directive development and make our little Directive alot more complicated and useful.
- What is this Directory.Packages.props file all about? - January 25, 2024
- How to add Tailwind CSS to Blazor website - November 20, 2023
- How to deploy a Blazor site to Netlify - November 17, 2023