
One of the really great things about the Raspberry Pi is that it is a Linux based computer, so pretty much anything you can do with a Linux computer you can do with a Pi - within reason!
I have previously written a post about being able to remotely access the Raspberry Pi via SSH
In this post, I'll provide instructions on how to create a network shared folder on raspberry pi, so you can easily move files back and forth to Pi to a Windows 8 computer or ubuntu desktop. I have connected my Raspberry Pi to my home network using Homeplug network.
For this post I will assume you already have connected your Pi via SSH, however you can still following along even if you haven't as all we really need is command line access to the Pi.
Equipment used in this tutorial
In order to configure a network share folder on your Raspberry Pi
- Raspberry Pi 3 Model B+
- RJ45 connection cable
- Broadband Router
- Network switch
- TP-LINK AV2000 Powerline Adapter Kit, 2-Port,
What is Samba
"Samba is an Open Source/Free Software suite that provides seamless file and print services to SMB/CIFS clients." Samba is freely available, unlike other SMB/CIFS implementations, and allows for interoperability between Linux/Unix servers and Windows-based clients.
Essentially Samba is a little bit of open source goodness that enables
Install Samba
Installing Samba is
sudo apt-get update
sudo apt-get install samba # Answer Yes to DHCP
sudo apt-get install samba-common-bin
After we've installed samba on our pi, we need to carry out 2 configuration steps.
Create a folder you will use to share and configure samba to share your folder.
Create Public folder to share
Creating a folder to share is really easy, we'll just create a folder and call it public.
mkdir public
Configure Samba
We now need to edit the samba configuration file, so we'll open the file in nano
sudo nano /etc/samba/smb.conf
We need to edit this file in a few locations.
Firstly, because we are going to access the Pi from a Windows 8 computer, we'll need to change
# Change the setting
# Change this to the workgroup/NT-domain name your Samba server will part of
workgroup = WORKGROUP
wins support = yes
Add the following section
[PiShare]
 comment=Raspberry Pi Share
 path=/home/pi/public
 browseable=Yes
 writeable=Yes
 only guest=no
 create mask=0777
 directory mask=0777
 public=no
We now need to exit out of nano so Ctrl + X and save it.
We'll run a check on the config file to ensure we haven't broken anything
testparm
We should see something like this
Load smb config files from /etc/samba/smb.conf
rlimit_max: increasing rlimit_max (1024) to minimum Windows limit (16384)
Processing section "[homes]"
Processing section "[printers]"
Processing section "[print$]"
Processing section "[public]"
Loaded services file OK.
Server role: ROLE_STANDALONE
Press enter to see a dump of your service definitions
Your Pi should now be sharing files on the network!
Access PI Shared folder on Windows
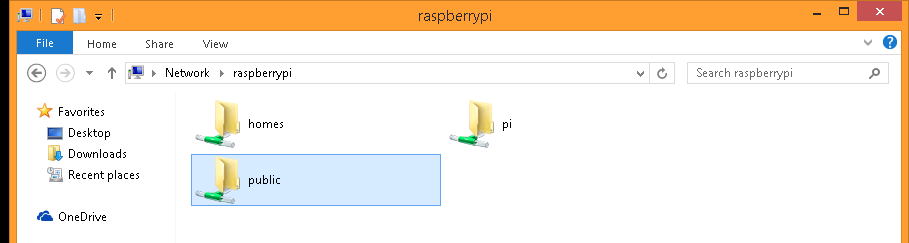
You should now be able to access your Raspberry Pi shared folder from you windows machine by open files & folders and navigating to \\raspberrypi
Double clicking on the public folder you may be prompted for a username and password . The default username is pi and the default password is raspberry
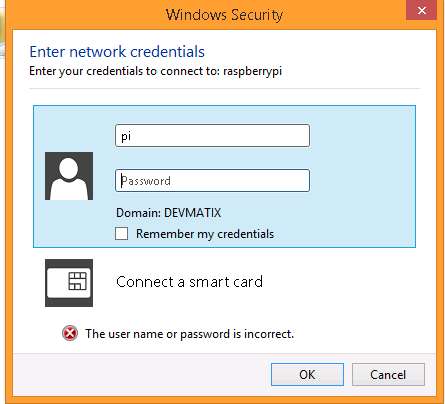
Once you've entered these you are into the shared folder and you can now add, remove and update files as you wish.
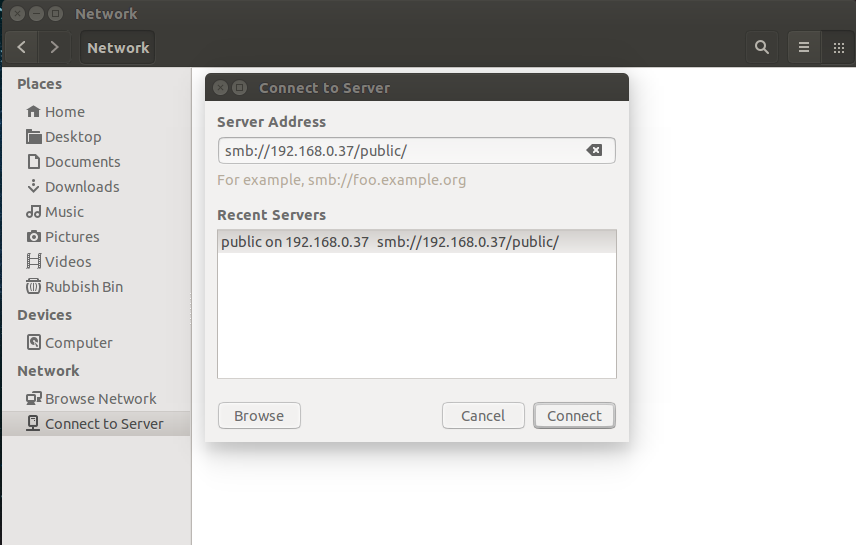
Access Pi Shared Folder on Ubuntu
To Access the same folder from a Ubuntu machine simply open files and folders and click on Connect to Server and enter the same credentials as above, but use the IP address of the Pi
A reminder again that this is a very permissive share and I would strongly advise against leaving it this open, if you plan to connect the Pi to the internet or you're going to store any particularly sensitive information.

- What is this Directory.Packages.props file all about? - January 25, 2024
- How to add Tailwind CSS to Blazor website - November 20, 2023
- How to deploy a Blazor site to Netlify - November 17, 2023