
In any software development project, a Continuous Integration / Continuous Deployment DevOps environment is essential. Continuous integration (CI) and continuous delivery (CD) embody a culture, set of operating principles, and collection of practices that enable software development teams to deliver code changes more frequently and reliably. The implementation is also known as the CI/CD pipeline.
Continuous integration is a coding philosophy and set of practices that drive development teams to implement small changes and commit code to version control repositories frequently.
This is primarily driven by the fact that most modern applications require developing code in different platforms and tools, the team needs a mechanism to integrate and validate its changes.
Continuous delivery picks up where continuous integration ends, by automating the delivery of applications to selected infrastructure environments. Software Development teams work with multiple environments other than the production, such as development and testing environments, and CD ensures there is an automated way to push code changes to them.
CI/CD tools help store the environment-specific parameters that must be packaged with each delivery. CI/CD automation then performs any necessary service calls to web servers, databases, and other services that may need to be restarted or follow other procedures when applications are deployed.
Although, much of the documentation regarding CI/CD is quite focused around Collaboration and Communication for Software Development Teams in an enterprise setting. I would argue that even for lone developers and one man empires, CI/CD is vitally important, because it helps you to automate a lot of the cruft work when it comes to building and maintaining projects.
Having and effective CI/CD pipeline in place, can at times make 1 developer more productive than 2-3 developers. Although i would concede that there is an initial impact of getting everything set up and configured.
In this post I will detail the steps on how to install and configure Team City on a Ubuntu server. This is primarily driven by the fact, that despite I am usually a big fan of JetBrains Products and a long time subscriber to the All Products Pack, and usually find the documentation really helpful to get me up to speed. I would have to admit that the documentation TeamCity, particularly regarding getting it installed and configured on Linux, to be really confusing and lacking.
Install Java
Team City is a Java Based application and therefore needs the JRE & JDK installed with the JAVA_HOME environment variable pointing to the Java installation directory. I am installing on a fresh install of ubuntu 16.X and Java is not installed by default.
In order to Install Java we will need to SSH on to the box and install Java Via via apt.
To install Java on your ubuntu server follow these steps
Install default Java JDK
SSH into your server and install the default java JDK in the ubuntu repository.
Check your Java Version
The version information returned should be similar too:
Install Database software
Team City is able to store TeamCity stores build history, users, build results and some run time data to a number of Relation Database Management Systems (RDBMS) including
- Postrgre SQL
- MySQL
- MS SQL
- Oracle
- Default Internal DB
Download & Install Team city
Download the latest TeamCity for linux from Jetbrains
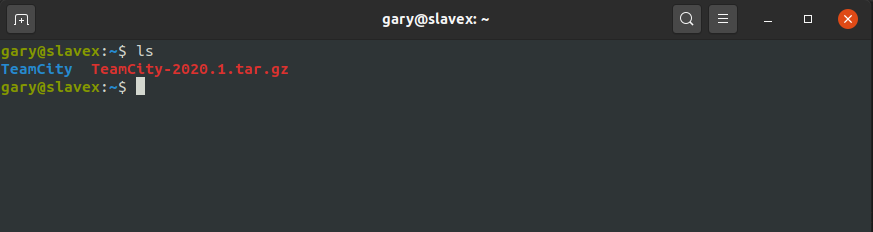
After the download completes unpack the file
Once unpacked you will then have a TeamCity folder which will contain all the application files you need.
Start Team City Service for evaluation purposes
If you want to simply start Team City for evaluation purposes then are now ready to start TeamCity and now all we have to do is.
You should now be able to browse to your server location .ie http://192.168.0.03:8111/and continue to configure and Install TeamCity using the Web Application front end.
Using this option, Team City will start up and a Default Build Agent will be started on the same server as Team City, which is not entirely optimal for Production Purposes.
In production environment, you should ideally install your Build Agents on a separate server, as I have explained in Configure Ubuntu headless server 16.x as TeamCity Build Agent to use Cake.
Start Team City for production use
For production use cases, you will need to use the teamcity-server.sh script, which only starts the Team City Application and does not start up the default Build Agent.
If you use the command .TeamCity/bin/teamcity-server.sh without pasing any parameters will provide a instructions on how to use the command.

you can now use the command ./TeamCity/bin/teamcity-server.sh start then you can navigate to whichever URL your application is installed on, in my case we'll simply be making use of an IP Address .i.e http://192.168.0.12:8111/

Ensure restart on server reboot
We need to do an additional step to ensure that whenever we restart the server at any point that TeamCity will autostart. To do so we will include a script in the /etc/init.d directory, which are started during the boot process (or executed when you shutdown or reboot the system).
To do so we'll use nano to create the script
Then we can simply copy and paste the following script
Save the script (ctrl + x )
Then we just need to set the correct permissions. If you would like to test the script is working you may want to stop your current instance of Team City if it is running.
We can now set the permissions on the start up script and ensure the entry is committed to the defaults and then use the script to start Team City
Optional - Install Nginx
Team City comes prepackaged with the Apache Webserver, so for the most the application should just work if you followed the instructions above. However, at threenine and Denizon we prefer to make use of nginx as our web server technology of choice, so tend to configure Nginx to serve TeamCity.
We are installing TeamCity on a headless server via SSH so we will not be able to access TeamCity configuration screens using a browser on my server and navigating to http://localhost:8111.
We will therefore need to install nginx so we will be able to access the configuration screens.
Installing nginx is straight forward all we need to do is execute the command below
Once nginx installed we can create a new site, which we will call teamcity
Paste following configuration code into the file
Save the file by using CTRL + X then we need to create a symlink to the sites-enabled folder
What are SymLinks ?
Symbolic links are basically advanced shortcuts. There are two type of symbolic links: Hard and soft.
Soft symbolic links work similarly to a standard shortcut. When you open a soft link to a folder, you will be redirected to the folder where the files are stored.Â
Hard Symbolic Link makes it appear as though the file or folder actually exists at the location of the symbolic link, and your applications won’t know any better.Â
I generally delete the default site that nginx creates and also the symlink
We can now restart nginx to ensure it picks up the new information
Summary
Team City is a vary easy to use to and configure CI/CD (Continuous Integration/Continuous Deployment) platform. A Freemium license for up to 20 build configurations and 3 free Build Agent licenses is available.
It is possible to use Team City to build Microsoft .net core applications on a Linux Server and all that is required is the basic configuration. Once the basic configuration is complete you can move on to either configuring a Windows Build Agent or Configure Ubuntu headless server 16.x as TeamCity Build Agent to use Cake
- What is this Directory.Packages.props file all about? - January 25, 2024
- How to add Tailwind CSS to Blazor website - November 20, 2023
- How to deploy a Blazor site to Netlify - November 17, 2023