
Learning and understanding Laravel, the PHP framework for web artisans can greatly improve your PHP development experience and actually make it fun, by concentrating on the things that matter most. Laravel takes care of all the boring lower value cruft work a developer has to go through just to get a typical site up and running
It really is an awesome framework, however, for a new developer to get it installed can be somewhat intimidating and there are so many tools and components that come along with it, that things can get a little confusing.
Although the documentation on Laravel is quite extensive and can really help to get you working with the framework, Ironically we have found that the documentation to get it all installed and working can be a little confusing and in some areas lacking.
In this post, you learn how to install Laravel on Ubuntu 18.04 to get up and running quickly and get started building your new exciting product quickly!
Install PHP 8.1 on ubuntu 22.04
Installing PHP 7 is not essential if you are going to make use of Homestead environment. However, it is always useful to have PHP installed on your development machine or laptop. In my case, I often use it to quickly develop utility scripts. I may also have several other PHP software development frameworks installed.
We are going to install Laravel and all the associated components making use of the Terminal commands.
Linux & Ubuntu Terminal Command Cheat sheets
In order to do this open a terminal window ctrl + alt + t
In Ubuntu 18.04, the latest release of PHP 8.1 is now available in the default repositories so you no longer need to additional repositories.
It's always good practice to update your repositories and carry out any upgrades
We can now go ahead and install PHP7.2 with all the additional components we need to install Laravel.
sudo apt install php8.1 php8.1-cli php8.1-common php8.1-opcache php8.1-mysql php8.1-mbstring php8.1-zip php8.1-fpm php8.1-xml -y
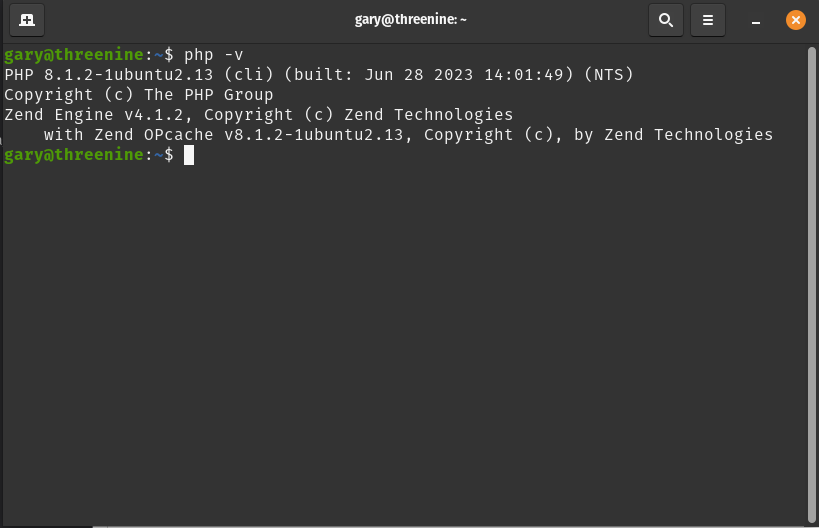
To ensure we have everything installed and PHP is working lets quickly check the version using php -v
How to Install MySQL on Ubuntu 18.04
If you are going to mostly make use of the Homestead environment for you Laravel Development, which is what I generally recommend doing so for Laravel based development, then you don't need to do this step. However, I do know some developers who prefer to have a MySQL or Postgres installed on their local machines directly.
If you are going to use Homestead, feel free to skip this section.
You can install whichever database server you wish but in my case, I needed to use MySQL
Once installed just you'll want to run the included security script. This changes some of the less secure default options for things like remote root logins and sample users.
How to install curl ubuntu 18.04
Typically on fresh installs of Ubuntu iscURL not installed. cURL is a computer software project providing a library and command-line tool for transferring data using various protocols
Install composer on Ubuntu 18.04
The Laravel uses the composer to manage your dependencies, so the next step is to install Composer.
curl -sS https://getcomposer.org/installer | sudo php -- --install-dir=/usr/local/bin --filename=composer
Change permissions on composer so you can run it without sudo
Install Symfony on Ubuntu 18.04
Laravel leverages another PHP framework, Symfony, quite intensively so it worthwhile installing Symfony on your development machine too.
We'll use Composer to install the Skeleton and create a testproj
Afer installing and creating the test projects lets run it to check we have everything working as expected.

Lets quickly run the project to test all is working. Change into the directory cd testproj and execute php -S 127.0.0.1:8000 -t public
We can now open our browser and navigate to http://localhost:8000/ .

We should see the test page which confirms all is up and running
Install Laravel on Ubuntu 18.04
We're now ready to install Laravel using composer
Add Laravel to Path on ubuntu 18.04
All that is left to do now is ensure Laravel is added to you PATH
Approach 1
To do simply open your ~/.bashrc
Towards the bottom of the file just paste the following line
After editing your ~/.bashrc you will need to refresh your current terminal to activate those changes. To do so simply
Approach 2
If you would prefer to do this all in one line without manually editing your ~/.bashrc you can do so by
After editing your ~/.bashrc you will need to refresh your current terminal to activate those changes. To do so simply
Start a Laravel project on Ubuntu 18.04
We're all set now to create project using Laravel. We can use either method of starting a project i.e. using Laravel commands of composer based. For the purpose of this guide we'll be using Laravel.
To start a new project create a directory you would like to store your projects i.e. mkdir projects
change in to the directory cd projects and then we can use the Laravel command to create a new project which in this instance is a simple To Do List web application we'll name notepad, but you can name it whatever you choose.
composer create-project --prefer-dist laravel/laravel notepad
If you have taken the time add Laravel to your path, this process is greatly simplified and you can simply use
Once the application is generated we can cd notepad the php artisan serve and the we then open a browser and visit http://localhost:8000 we'll see the laravel sample page

Laravel is now up and running and you can continue to develop using just this, however to really enjoy the benefits of developing with Laravel I recommend installing Homestead.
install VirtualBox on Ubuntu 18.04
VirtualBox is a cross-platform virtualization application. Enabling you to extend the capabilities of your computer so that it can run multiple operating systems (inside multiple virtual machines) at the same time.
Using VirtualBox is a great way to test new versions of operating systems before upgrading your main machine.
For software developers, VirtualBox allows you to mimic your production platform. No more headaches because some software feature which worked great on your machine but isn't working in production. Simply do your development within the virtual machine.
To install Virtual Box using the terminal
Do not install Extension Pack via the terminal
At the time of writing this post, there seemed to be an issue with installing the virtual box extension pack via the terminal, so I needed use a work-around.
Download Virtual Box Extension pack 5.2.10 and manually install it.
Once download is complete Open virtual box and install the extension pack:
File -> Preferences -> Extensions -> Adds new package ("+" Button)
install Vagrant on Ubuntu 18.04
Vagrant is a software for creating a full development environment within minutes. Vagrant provides a simple and easy to use command-line client for managing these environments, and an interpreter for the text-based definitions of what each environment looks like, called Vagrantfiles.
It's Open Source and free to use.
Once vagrant has finished installing we can now install the Homestead box
This should take a few minutes to complete, depending on your machine & internet connection. It has taken as long as 20 minutes, but it only ever has to be done once.
SSH Key Generation
If you're already using Github and have previously generated you SSH keys you don't to do this step. If not go ahead and create SSH keys
Install Homestead
There are two ways you can use Homestead i.e. Global or Per Project.
I will guide you through using on a per-project basis. To do this we change into our project folder and install homestead using composer
We now need to execute the following command which will homestead.yaml and Vagrantfile
This will create a homestead.yaml in the Homestead directory which will contain all your homestead configuration details.
I always store all my code and projects in a directory in code
Edit Host file
We need to edit the host file to ensure that it points to the directory for the url http://sourcelink.test
To edit the
Once all this configuration is complete you can now
Wait a couple of minutes and your entire Laravel Full Stack application is up and running.
Summary
I have to admit that it is probably not the most friction-free experience I have had configuring the various software development frameworks, but Laravel more than makes up for it as you start working with it.
If you've made it this far and you have a project up and running and ready to develop, you may want to check out How to add Vuetify to Laravel Project to further simply and enhance your UI workflow.
You can also learn how to start develop a SPA with Vue.JS and Laravel
Hope this guide helps you on your way to becoming an efficient Laravel developer and save you time and frustration on your journey.
- What is this Directory.Packages.props file all about? - January 25, 2024
- How to add Tailwind CSS to Blazor website - November 20, 2023
- How to deploy a Blazor site to Netlify - November 17, 2023