Often when developing software applications you'll stumble across an effective approach to defining the structure and format for your projects. Especially when developing Microservices, your organisation may find that it will require to develop a number of services which all implement a consistent pattern, albeit that their implementations may vary.
A project template, can help teams to implement projects quickly. I must stress that sometimes it can be a fine line between creating a template and falling into the trap of developing a framework, often I have witnessed teams fall into this trap.
In Developing Api's using HTTP Endpoints we seen how we could greatly improve our .net based API's by making use of Clean Architecture approach. In that post we modified an existing Web API project template and installed a few nuget packages to get our project up and running. It would get pretty tiring and boring to have to do that everytime we wanted to create a new API project to that approach.
In this post, we develop a reusable project template to create our basic project structure for us with everything included out the box.
What is a dotnet project template
Programming frameworks typically have a templating system, which enable you to create new projects, files and methods etc quickly. The .NET Core SDK, incorporates a template system and most dotnet developers may already be familiar with it, because for the most part they will use to create a new dotnet project.
The .net core template system is exposed through the dotnet new terminal command , which provides a few options to tweak the output and select the type of project you want to create
Create a project
In our example, we're going to first create a standard .net core web Api project, then we 're going to modify it to make use of the Ardralis API endpoints and also include a few other of my preferred libraries I like to use when developing API projects.
The default .NET Core SDK installation provides some initial templates and to list all the available templates, just run the following command with no parameters.
dotnet new --list
This will provide us with a list of all the available templates on our machine
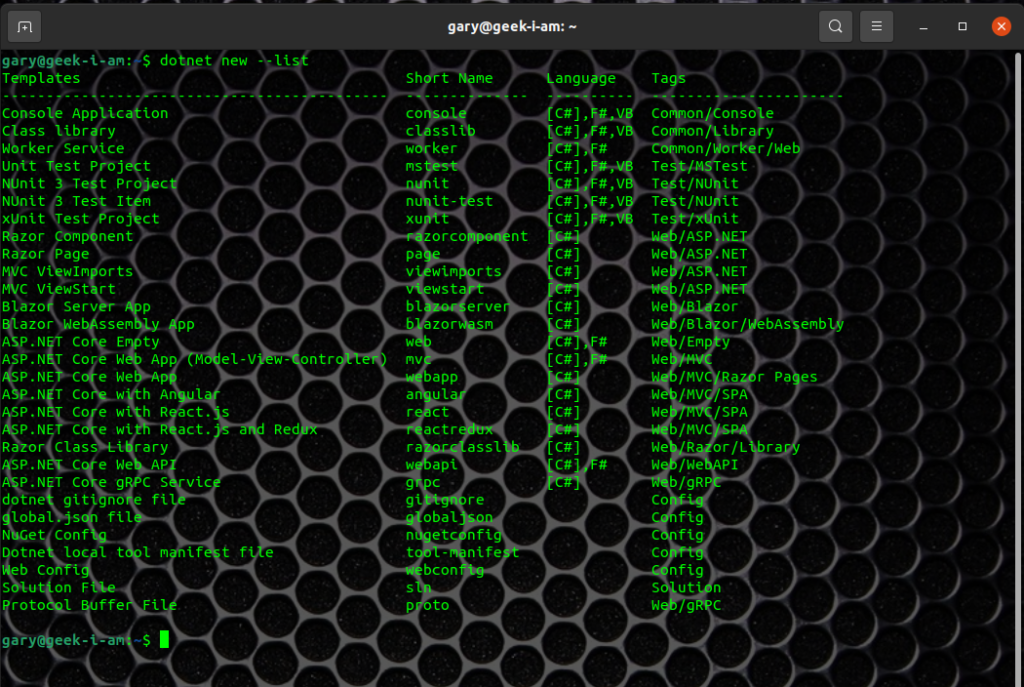
In our example we're going to initially make use of the Web API project template, so we'll use the following command:
dotnet new webapi -o ApiProject
This will generate a standard Web Api Project with the familiar layout.

Our first step at this point is to Delete the Controllers folder and the WeatherForecast.cs because we won't be needing them.
Then we will modify our ApiProject.csproj with content below, adding all my preferred libraries for developing Web API projects.
<Project Sdk="Microsoft.NET.Sdk.Web">
    <PropertyGroup>
        <TargetFramework>net5.0</TargetFramework>
    </PropertyGroup>

    <ItemGroup>
        <PackageReference Include="Ardalis.ApiEndpoints" Version="3.0.0" />
        <PackageReference Include="AutoMapper" Version="10.1.1" />
        <PackageReference Include="AutoMapper.Extensions.Microsoft.DependencyInjection" Version="8.1.0" />
        <PackageReference Include="Dawn.Guard" Version="1.12.0" />
        <PackageReference Include="MediatR" Version="9.0.0" />
        <PackageReference Include="MediatR.Extensions.Microsoft.DependencyInjection" Version="9.0.0" />
        <PackageReference Include="Serilog" Version="2.10.0" />
        <PackageReference Include="Serilog.AspNetCore" Version="4.1.0" />
        <PackageReference Include="Swashbuckle.AspNetCore" Version="6.1.1" />
        <PackageReference Include="Swashbuckle.AspNetCore.Annotations" Version="6.1.1" />
    </ItemGroup>
</Project>
We now want to create our sample project layout by providing an example of how to use it. I won't go into too much here, about the files and folders we just added because I have discussed them in detail in Developing Apis using Http Endpoints
In this project I have implemented to make use of the Vertical Slice Architecture . Implementing a Vertical Slice Architecture is primarily focused on limiting coupling and dependencies, by organising code across a feature rather than layers. The focus is on features and capabilities rather than technical concerns. Coupling is limited by the scope of the feature and the size of the vertical slice.

The next step we want to do is enable our configuration of Serilog, because we have added it as reference to our project. I have previously discussed implementing Serilog in .net core projects so I won't discuss the intricacies here, but just provide the code we need to add to the Program.cs
public class Program
    {
        public static void Main(string[] args)
        {
            CreateHostBuilder(args).Build().Run();
        }

        public static IHostBuilder CreateHostBuilder(string[] args) =>
            Host.CreateDefaultBuilder(args)
                .UseSerilog((hostContext, LoggerConfiguration) =>
                {
                    LoggerConfiguration.ReadFrom.Configuration(hostContext.Configuration);
                })
                .ConfigureWebHostDefaults(webBuilder => { webBuilder.UseStartup<Startup>(); });
    }
We also want to update the StartUp.cs , the important points here is that we are wiring Mediatr and Serilog Request Logging.
 public class Startup
    {
        public Startup(IConfiguration configuration)
        {
            Configuration = configuration;
        }

        public IConfiguration Configuration { get; }

        // This method gets called by the runtime. Use this method to add services to the container.
        public void ConfigureServices(IServiceCollection services)
        {
            services.AddControllers();
            services.AddSwaggerGen(c =>
            {
                c.SwaggerDoc("v1", new OpenApiInfo {Title = "ApiProject", Version = "v1"});
                c.EnableAnnotations();
            });
            services.AddMediatR(typeof(Startup));
        }

        // This method gets called by the runtime. Use this method to configure the HTTP request pipeline.
        public void Configure(IApplicationBuilder app, IWebHostEnvironment env)
        {
            app.UseSerilogRequestLogging();
            if (env.IsDevelopment())
            {
                app.UseDeveloperExceptionPage();
                app.UseSwagger();
                app.UseSwaggerUI(c => c.SwaggerEndpoint("/swagger/v1/swagger.json", "ApiProject v1"));
            }

            app.UseHttpsRedirection();

            app.UseRouting();

            app.UseAuthorization();

            app.UseEndpoints(endpoints => { endpoints.MapControllers(); });
        }
    }
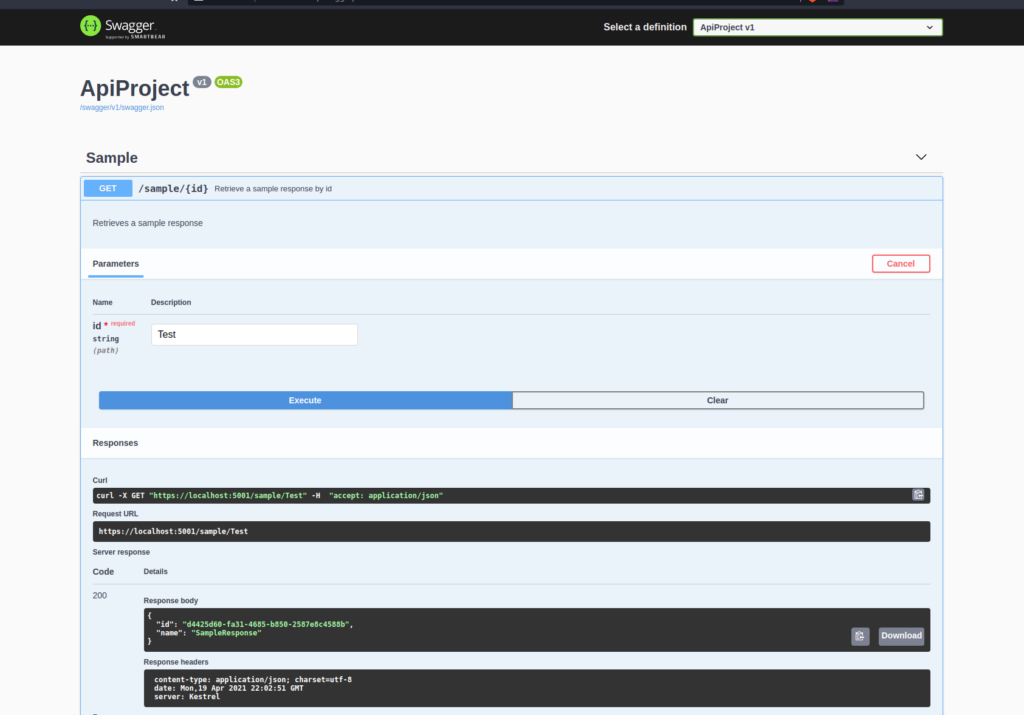
We have now essentially completed the initial implementation of our template project. We can run the project and ensure it all works. If we start our project we should get a browser window open up with our swagger endpoints being displayed
Create a template
We've now completed the grunt work of setting up project as to how we like, now we can start using it to create our template.
The first step to actually converting our project to a project template it to a a new folder to the root of our project folder and name it .template.config and inside that folder create a JSON file and name it template.json.
We need to add the following to our template.json to provide details about our template
{
  "author": "Gary Woodfine",
  "name": "API Project Template",
  "description": "Project template to create Adralis API endpoint project",
  "identity": "threenine.ApiProject.1.0",
  "shortName": "apiproject",
  "tags": {
    "language": "C#",
    "type": "project"
  },
  "sourceName": "ApiProject",
  "symbols": {
    "Framework": {
      "type": "parameter",
      "description": "The target framework for the project.",
      "datatype": "choice",
      "choices": [
        {
          "choice": "net5.0"
        },
      ],
      "defaultValue": "net5.0"
    }
  }
}
The $schema value is always the same. This just tells compatible IDEs how to offer assistance when creating these documents. For example, Visual Studio Code will use the schema to offer some IntelliSense to us.
The author value is fairly self explanatory you can put any value you want in here i.e. Company Name, Person etc..
The classifications value is an array of descriptions you might use for your project. These are listed when you do dotnet new --list.
The identity value is a unique name for the template within the dotnet new list. You can use some sort of reverse-DNS notation or just about anything. (There seems to be a trend to put language in the last portion, but that is likely only needed if you have multiple language versions of a single template.)
The name value is the user-visible name for your template.
shortName value is the name people can use when creating projects from templates via command line, in the form of dotnet new {shortName}.
sourceName The name in the source tree to replace with the name the user specifies. The template engine will look for any occurrence of the sourceName mentioned in the config file and replace it in file names and file contents. The value to be replaced with can be given using the -n or --name options while running a template. If no name is specified, the current directory is used.
Installing the template
At this stage our new template can easily be installed and used on our local machine to create new projects.
We can add our template to dotnet new template list simply by doing executing the following command in our terminal window.
dotnet new --install .
This command will install the current directory (.) as a template. If your command line's current directory is somewhere other than the template, you will need to adjust this accordingly.
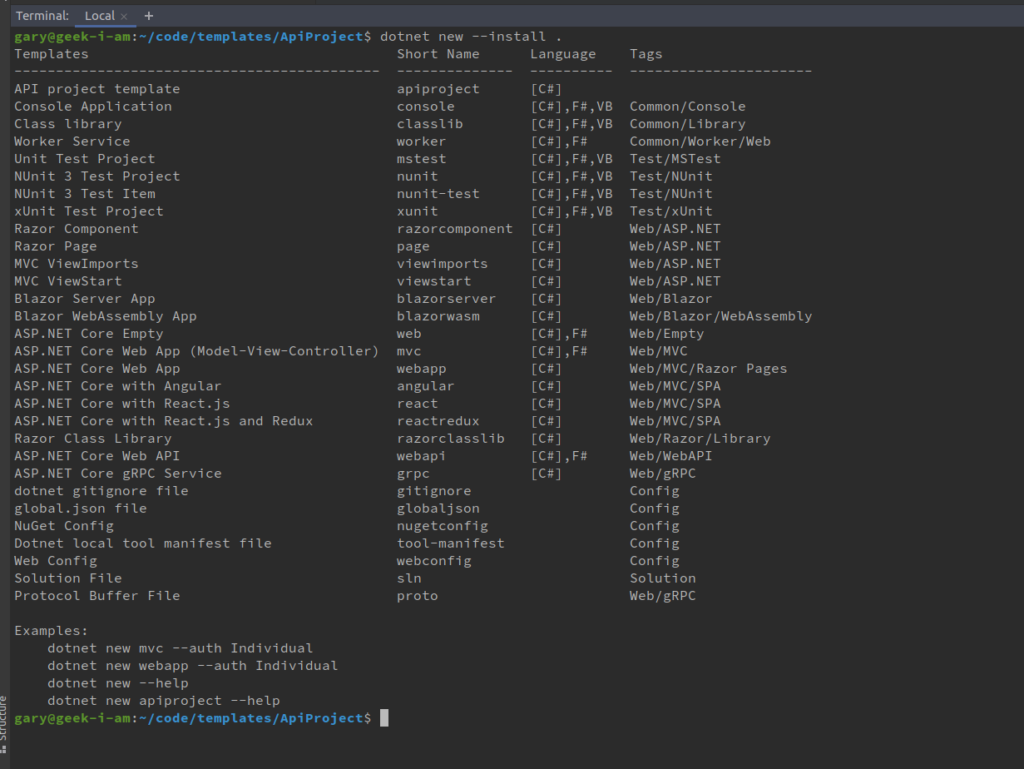
We can now generate new projects based on our template simply by using the dotnet new command and the name of our template
dotnet new apiproject

## or if we want to provide a specifc name for our project
dotnet new apriproject -o testproj
Removing a Template
If you want to remove the template for whatever reason you can simply use dotnet new -u which will in turn list the templates and then also provide the instruction on how to remove the template you want.

In my case I simply want to use:
dotnet new -u /home/gary/code/templates/ApiProject
Distributing the template
The above example approach of managing and installing your template locally works great if you're working on your own and are only creating templates for yourself. Usually though software developers work in teams, and you'll often want to share your templates with other colleagues and teams.
A great way to share templates is via Nuget.org by packaging up your template as a nuget package.
To do this simply edit your .csproj file and add the following details. The most notable points would be to ensure that PackageType as been set to Template .
You also need to ensure you provide values for IncludeContentInPack , IncludeBuildOutput.
The rest of the values you should populate as you require.
 <PropertyGroup>
        <PackageType>Template</PackageType>
        <PackageId>Threenine.ApiProject</PackageId>
        <TargetFramework>net5.0</TargetFramework>
        <IsPackable>true</IsPackable>
        <Title>API Project template</Title>
        <Authors>Gary Woodfine</Authors>
        <Description>Project template to create Adralis API endpoint project</Description>
        <RepositoryType>git</RepositoryType>
        <PackageTags>api project, api endpoints,</PackageTags>
        <RepositoryUrl>https://github.com/threenine/api-template</RepositoryUrl>
        <Copyright>Copyright © 2005 - 2021 Three Nine Consulting Limited</Copyright>
        <PackageProjectUrl>https://threenine.co.uk</PackageProjectUrl>
        <PackageLicenseUrl>https://github.com/threenine/api-template/blob/master/LICENSE</PackageLicenseUrl>
        <PackageIconUrl>http://static.threenine.co.uk/threenine_icon.png</PackageIconUrl>
        <IncludeContentInPack>true</IncludeContentInPack>
        <IncludeBuildOutput>false</IncludeBuildOutput>
        <EnableDefaultContentItems>false</EnableDefaultContentItems>
        <NoDefaultExcludes>true</NoDefaultExcludes>
    </PropertyGroup>
    <ItemGroup>
        <Content Include="**\**" Exclude="**\bin\**;**\obj\**;**\.idea\**" />
    </ItemGroup>
  <!-- Other content bellow here -->
In our case we make use of Jetbrains TeamCity four our Continuous Integration so when committing a change to the Github Repository the code will be built, packaged and deployed to Nuget automatically.
We are also in the process of migrating from our Open Premise TeamCity to the TeamCity In the Cloud
Once the package is available on Nuget your team will be able to install it making use of the command provided on Nuget
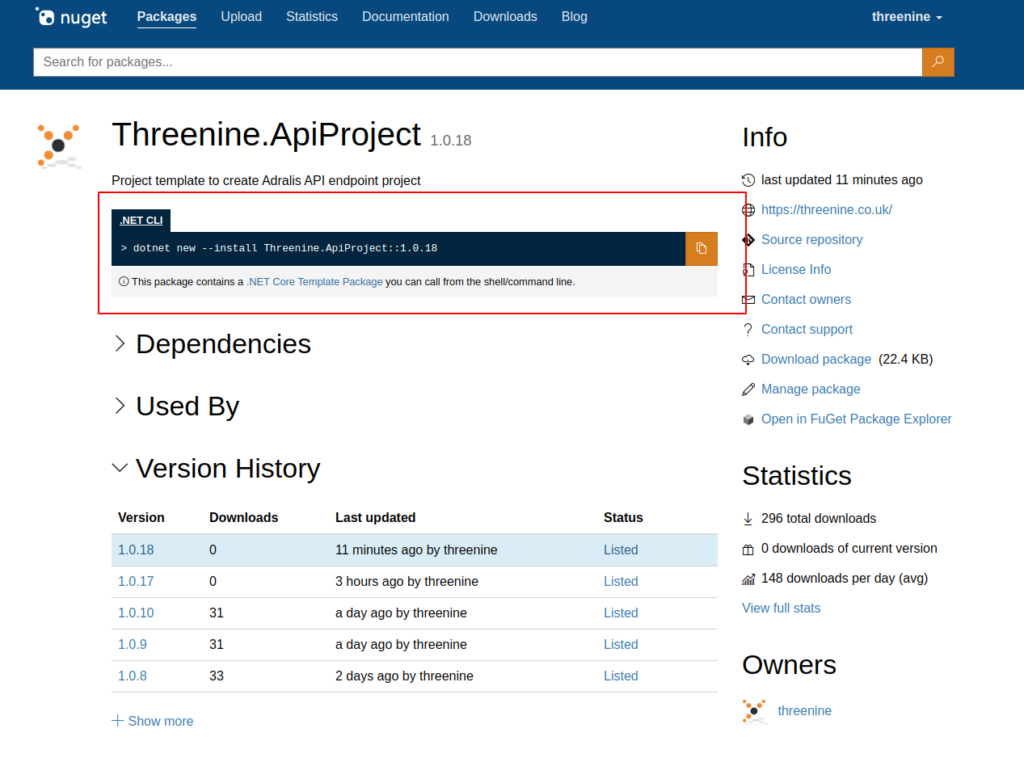
Installing the template using
dotnet new --install Threenine.ApiProject::1.0.18
Will now enable us to generate a new project from the command line just as before, however we will now be making use of the template from Nuget which now can be shared with whoever would like to use it
dotnet new apiproject -o YourProjectName
Using templates in Rider
I predominantly use Jetbrains Rider Fast & powerful cross-platform .NET IDE for all my .net core development primarily because I only use Ubuntu Linux Desktop . After installing our template it now also becomes available in Rider so we can create new projects and solutions using the New Project/Solution dialog box
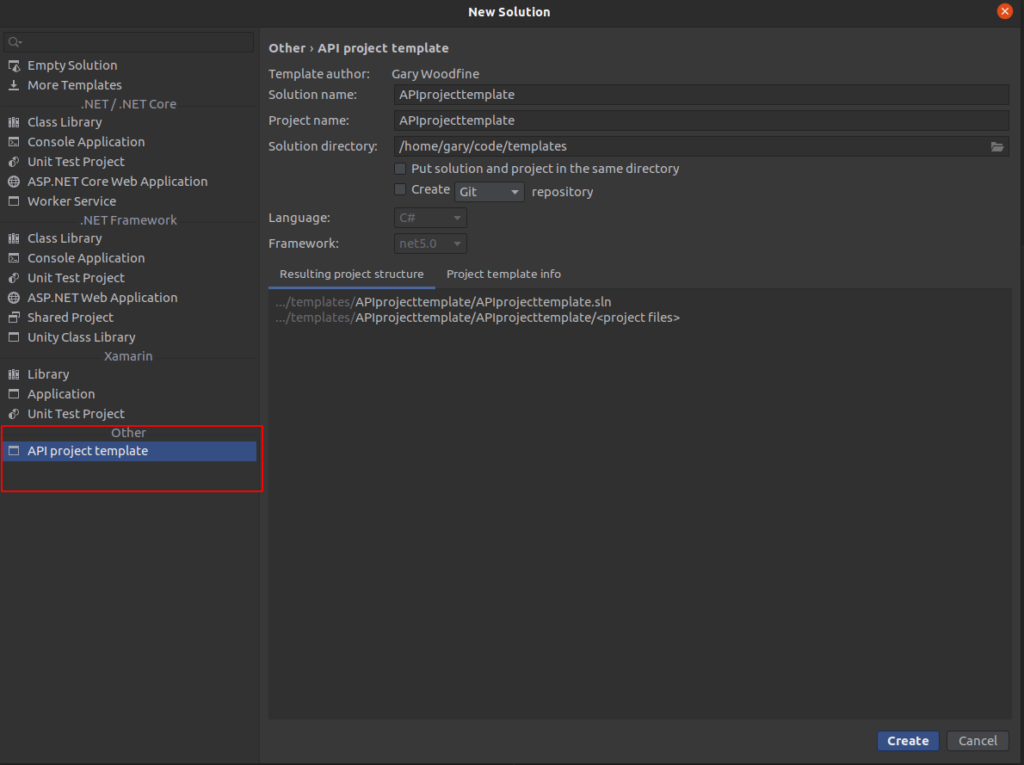
Conclusion
In this post we walked through the process of how to start creating your own customised project templates using .net core. We created our own template based on the Adralis API Endpoints, which I previously introduced in Developing Apis using Http Endpoints, to enable a quicker and less tedious process of configuring projects to make use of it.
The simplicity of the .net core packing and publishing tool, enables you simply use what you're already doing to make doing what you're already doing faster. No need to learn a new complex template language.
- What is this Directory.Packages.props file all about? - January 25, 2024
- How to add Tailwind CSS to Blazor website - November 20, 2023
- How to deploy a Blazor site to Netlify - November 17, 2023
